Introduction
As part of the installation the following tasks will be performed including installation of Zetaris prerequisite software:
-
Java Installation
-
Apache Spark Installation
-
Zetaris Installation
-
Create non-privileged user
-
Start Zetaris
-
Configure Redhat Firewall
-
Configure AWS or Azure Inbound security roles (if applicable)
-
Login to Zetaris Platform
Software Requirements
| User privileges | Privileged access to your Linux system as root or via the sudo command |
| Operating System | Red Hat Enterprise Linux 8 |
| Java | java-1.8.0-openjdk |
| Spark | 3.1.3 |
| Zetaris Binaries | Contact Zetaris for installation binaries |
| Linux packages/utilities | lsof, net-tools package |
Install Java
-
Run the following command to install Java:
sudo yum install java-1.8.0-openjdk
- Run the following command to verify your Java installation and version:
java -version
You should see similar output:openjdk version "1.8.0_332"
OpenJDK Runtime Environment (build 1.8.0_332-b09)
OpenJDK 64-Bit Server VM (build 25.332-b09, mixed mode)
Install Apache Spark
-
Run the following command to download Spark:
curl https://dlcdn.apache.org/spark/spark-3.1.3/spark-3.1.3-bin-hadoop3.2.tgz --output spark-3.1.3-bin-hadoop3.2.tgz
-
Extract the archive
sudo tar xvf spark-3.1.3-bin-hadoop3.2.tgz -C /opt
- Create a symbolic link to make our paths easier to remember (you will need this later):
sudo ln -s /opt/spark-3.1.3-bin-hadoop3.2/ /opt/spark
Install Zetaris Server and GUI
This article uses installation binaries for version 2.1.0.1. If using later installation binaries for your installation the file names and path names will vary accordingly.
Installation binaries will be in the format:
- Server binary; zetaris-ndp-<version>*.tgz
- GUI binary: zetaris-ndp-gui-<version>*.tgz
-
Create the directory to extract the archive into:
sudo mkdir /opt/zetaris
-
Extract the server archive:
sudo tar xvf zetaris-ndp-2.1.0.1-production.tgz -C /opt/zetaris
-
Create a symbolic link to the server make our paths easier to remember
sudo ln -s /opt/zetaris/zetaris-ndp-2.1.0.1-p3-production/ /opt/zetaris/server
-
Extract the gui archive:
sudo tar xvf zetaris-ndp-gui-2.1.0.1-production.tgz -C /opt/zetaris
- Create a symbolic link to the gui make our paths easier to remember
sudo ln -s /opt/zetaris/zetaris-ndp-gui-2.1.0.1-p3/ /opt/zetaris/gui
Create non-privileged user
-
Create a non-privileged user named ndpadmin:
sudo useradd zetaris
-
Set the password for the new user:
sudo passwd zetaris
-
Assign ownership of the Spark directory to non-privileged user:
sudo chown -R zetaris: /opt/spark*
-
Assign ownership of the Zetaris directory to non-privileged user:
sudo chown -R zetaris: /opt/zetaris
Post Installation Configuration
Create and Configure Data Directory
Zetaris makes use of a data directory for cache and its network file system (which can be used for File Data Sources).
This requires creating the data directory, and specifying this directory in the GUI and Server configuration files.
- Run the following command to create the Zetaris data directory:
sudo mkdir /opt/zetaris/data
- Edit application.conf
-
Open the file:
sudo vi /opt/zetaris/gui/conf/application.conf
-
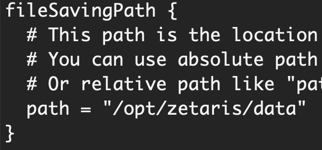
At the top of the file set fileSavingPath to the following:
path="/opt/zetaris/data"
- Go to line 148 and set filesystem_staging to the following:
filesystem_staging="/opt/zetaris/data"

- Save and close the file.
-
-
Edit Meta Store properties
-
Open the metastore_properties file
sudo vi /opt/zetaris/server/conf/meta_store.properties
-
Press : (colon), type set nu, and hit Enter to display line numbers.
-
Go to line 109 and edit the filesystem_staging property to reflect the following:
filesystem_staging=/opt/zetaris/data
-
Go to line 141 and edit the lightning_filecache_root_path to reflect the following:
lightning_filecache_root_path=/opt/zetaris/data/cache
-
Save your changes and close the file.
-
Add SPARK_HOME environment variable
There are several script files that reference the SPARK_HOME environment variable. This will need to be set in each of these script files.
- Add SPARK_HOME to start-lightning-server-with-derby.sh
-
Open the file
sudo vi /opt/zetaris/server/bin/start-lightning-server-with-derby.sh
-
On the 2nd line add the following:
export SPARK_HOME=/opt/spark

-
Save and close the file.
-
- Add SPARK_HOME to register-org.sh
-
-
Open the file:
sudo vi /opt/zetaris/server/bin/register-org.sh
-
On the 2nd line add the following:
export SPARK_HOME=/opt/spark

-
Save and close the file.
-
- Edit stop-all.sh
- Open the file
sudo vi /opt/zetaris/server/bin/stop-all.sh
- On the 2nd line add the following:
export SPARK_HOME=/opt/spark

- Save and close the file.
- Open the file
Run Zetaris as a Service
- Create the service file for the server component:
sudo vi /etc/systemd/system/zetaris-enterprise.service
- Add the following content
[Unit]

Description=Zetaris Enterprise Server Service

[Service]

Type=oneshot

RemainAfterExit=yes

User=zetaris

WorkingDirectory=/opt/zetaris/server/bin

ExecStart=/opt/zetaris/server/bin/start-all.sh

ExecStop=/opt/zetaris/server/bin/stop-all.sh

[Install]

WantedBy=multi-user.target - Save and close the file.
- Create the service file for the GUI component:
sudo vi /etc/systemd/system/zetaris-enterprise-gui.service
- Add the following content
[Unit]

Description=Zetaris Enterprise GUI Service

Requires=zetaris-enterprise.service

After=zetaris-enterprise.service

[Service]

Type=oneshot

RemainAfterExit=yes

User=zetaris

WorkingDirectory=/opt/zetaris/gui/bin

ExecStart=/opt/zetaris/gui/bin/start-lightning-gui.sh

ExecStop=/opt/zetaris/gui/bin/stop-lightning-gui.sh

[Install]

WantedBy=multi-user.target - Save and close the file.
Start Zetaris
-
Start the Server
sudo systemctl start zetaris-enterprise
-
Start the GUI
sudo systemctl start zetaris-enterprise-gui
-
Check the status of the Server
sudo systemctl status zetaris-enterprise
You should output similar to the following
zetaris-enterprise.service - Zetaris Enterprise Server Service
Loaded: loaded (/etc/systemd/system/zetaris-enterprise.service; disabled; vendor preset: disabled)
Active: active (exited) since Mon 2022-08-29 03:43:10 UTC; 28min ago
Process: 15992 ExecStart=/opt/zetaris/server/bin/start-all.sh (code=exited, status=0/SUCCESS)
Main PID: 15992 (code=exited, status=0/SUCCESS) -
Check the status of the GUI
sudo systemctl status zetaris-enterprise-gui
You should output similar to the following
zetaris-enterprise-gui.service - Zetaris Enterprise GUI Service
Loaded: loaded (/etc/systemd/system/zetaris-enterprise-gui.service; disabled; vendor preset: disabled)
Active: active (exited) since Mon 2022-08-29 03:44:40 UTC; 30min ago
Process: 16743 ExecStart=/opt/zetaris/gui/bin/start-lightning-gui.sh (code=exited, status=0/SUCCESS)
Main PID: 16743 (code=exited, status=0/SUCCESS) - Enable (optional) automatic start for both Server and GUI services.
sudo systemctl enable zetaris-enterprise
sudo systemctl enable zetaris-enterprise-gui
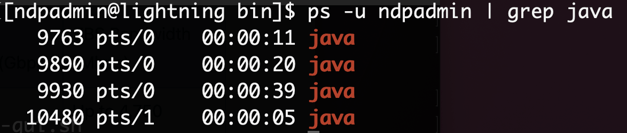
- Verify the Zetaris processes are running as the non-root user zetaris
ps -u zetaris | grep java
-
Register Zetaris user
- Switch to the zetaris user account
su - zetaris
- Create the user file
vi /opt/zetaris/server/bin/dev-org.csv
- Insert the following user details
First Name\tSurname\tEmail\tTeam(org name)\tPassword
Dev,Account,dev@account.com,Account,password
Note - you can adjust the values accordin
This creates the following user for login to the Zetaris platform:
userid: dev@account.com
password; password - Save and close the file.
- Register the user
/opt/zetaris/server/bin/register-org.sh dev-org.csv
- Switch to the zetaris user account
Open Redhat ports
Zetaris leverages the following ports that need to be externally accessible:
-
Web Application GUI port - default 9001
-
JDBC Driver port - default 10000
If the Redhat firewall is running you will need to configure the Redhat firewall to allows access to these ports.
- Run the command exit to switch back to the user with sudo privileges
exit
- Check if the Redhat firewall is running:
sudo systemctl status firewalld
-
Look for the following output:

-
If the firewall is running, configure the firewall as per Configure Redhat Firewall.
Create AWS or Azure Inbound Security Rules
For Zetaris running on AWS or Azure, you will need to add inbound rules that allow access to the following ports:
-
Web Application GUI port - default 9001
-
JDBC Driver port - default 10000
For Azure perform the steps as outlined in - Create Azure Inbound rules.
For AWS perform the steps as outlined in - Create AWS Inbound rules.
Login to Zetaris Platform
-
Login to Zetaris via your browser using:
http:<public IP address>:9001 -
Enter the following credentials:
username: dev@account
password: password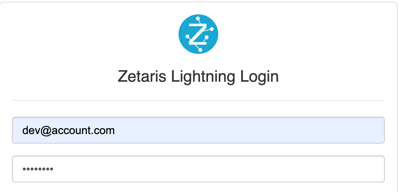
-
You should now see the Zetaris GUI:
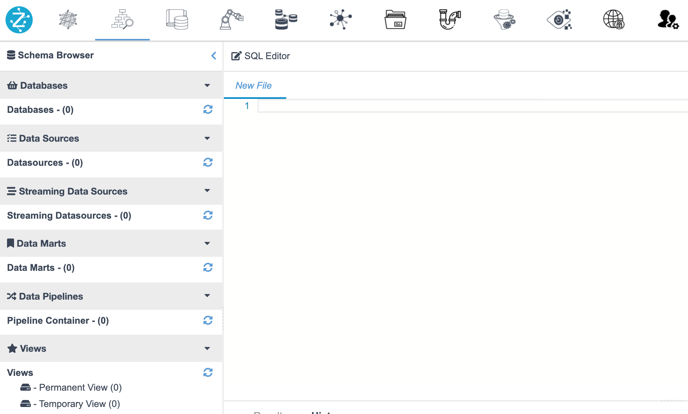
You should now be successfully logged into your Zetaris deployment.