Our Google BigQuery connection allows you to connect to your Google BigQuery tables, and query on them, without having to physically move them into Zetaris.
The Google BigQuery connection requires a connection to be established over OAuth.
Connect via NDP Fabric Builder
Connect via NDP Fabric Builder
Step 1: Click the Data Fabric Builder icon.
Step 2: Under Database Sources click the '+' next to Virtual Database Source to launch the wizard.

Step 3: When the GUI wizard launches accept the defaults and click Next.
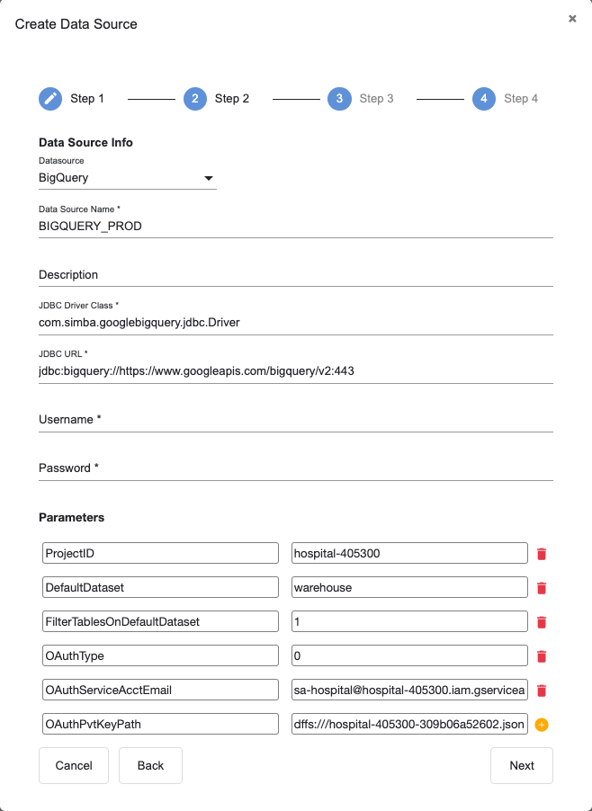
Step 4: Specify the following values for the connection:
| Parameter | Value |
| Datasource | Other JDBC |
| Data Source Name |
{database_name} NOTE: name cannot contain spaces |
| JDBC Driver Class | com.simba.googlebigquery.jdbc.Driver |
| JDBC URL | jdbc:bigquery://https://www.googleapis.com/bigquery/v2:443 |
| ProjectID | {bigquery_projectID} |
| DefaultDataset (optional) | {dataset_name} |
| FilterTablesOnDefaultDataset (optional if you want to only read tables from the defaultdataset, defined in DefaultDataset) | 1 |
| OAuthType | 0 |
| OAuthServiceAcctEmail |
{service_account_email} Help: |
| OAuthPvtKeyPath |
{path/to/key} Help: |
|
Required IAM Roles for BigQuery Service Account Access |
1. BigQuery Data Owner Shown Example:
|

Step 5: Select from the list of tables retrieved and click Next

Step 6: On the summary dialogue click Register.

Step 7: The BigQuery data source should now appear under:

Connect via SQL Editor
The syntax to connect to BigQuery via SQL Editor is shown below
To include all table in ProjectID, do not include DefaultDataset or FilterTablesOnDefaultDataset parameters
CREATE DATASOURCE GOOGLE_BIGQUERY OPTIONS (
  jdbcdriver "com.simba.googlebigquery.jdbc.Driver",
  jdbcurl "jdbc:bigquery://https://www.googleapis.com/bigquery/v2:443",
  ProjectID "<projectID>",
  DefaultDataset "<dataset>",
  FilterTablesOnDefaultDataset "1",
  OAuthType "<oauthType>",
  OAuthServiceAcctEmail "<oauthServiceAccountEmail>",
  OAuthPvtKeyPath "<oauthPrivateKeyPath>"
);

REGISTER DATASOURCE TABLES FROM GOOGLE_BIGQUERY;
Example connection string:
CREATE DATASOURCE BIG_QUERY_HOSPITAL OPTIONS (
  jdbcdriver "com.simba.googlebigquery.jdbc.Driver",
  jdbcurl "jdbc:bigquery://https://www.googleapis.com/bigquery/v2:443",
  ProjectID "hospital-405300",
  DefaultDataset "warehouse",
  FilterTablesOnDefaultDataset "1",
  OAuthType "0",
  OAuthServiceAcctEmail "sa-hospital@hospital-405300.iam.gserviceaccount.com",
  OAuthPvtKeyPath "dffs:///hospital-405300-309b06a52602.json"
);

REGISTER DATASOURCE TABLES FROM BIG_QUERY_HOSPITAL;
Google Details
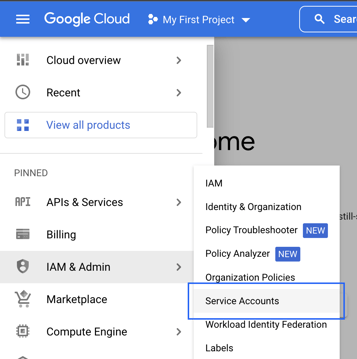
Where is your Google Cloud Service Account Email?
Step 1: Go to IAM & Admin > Service Accounts
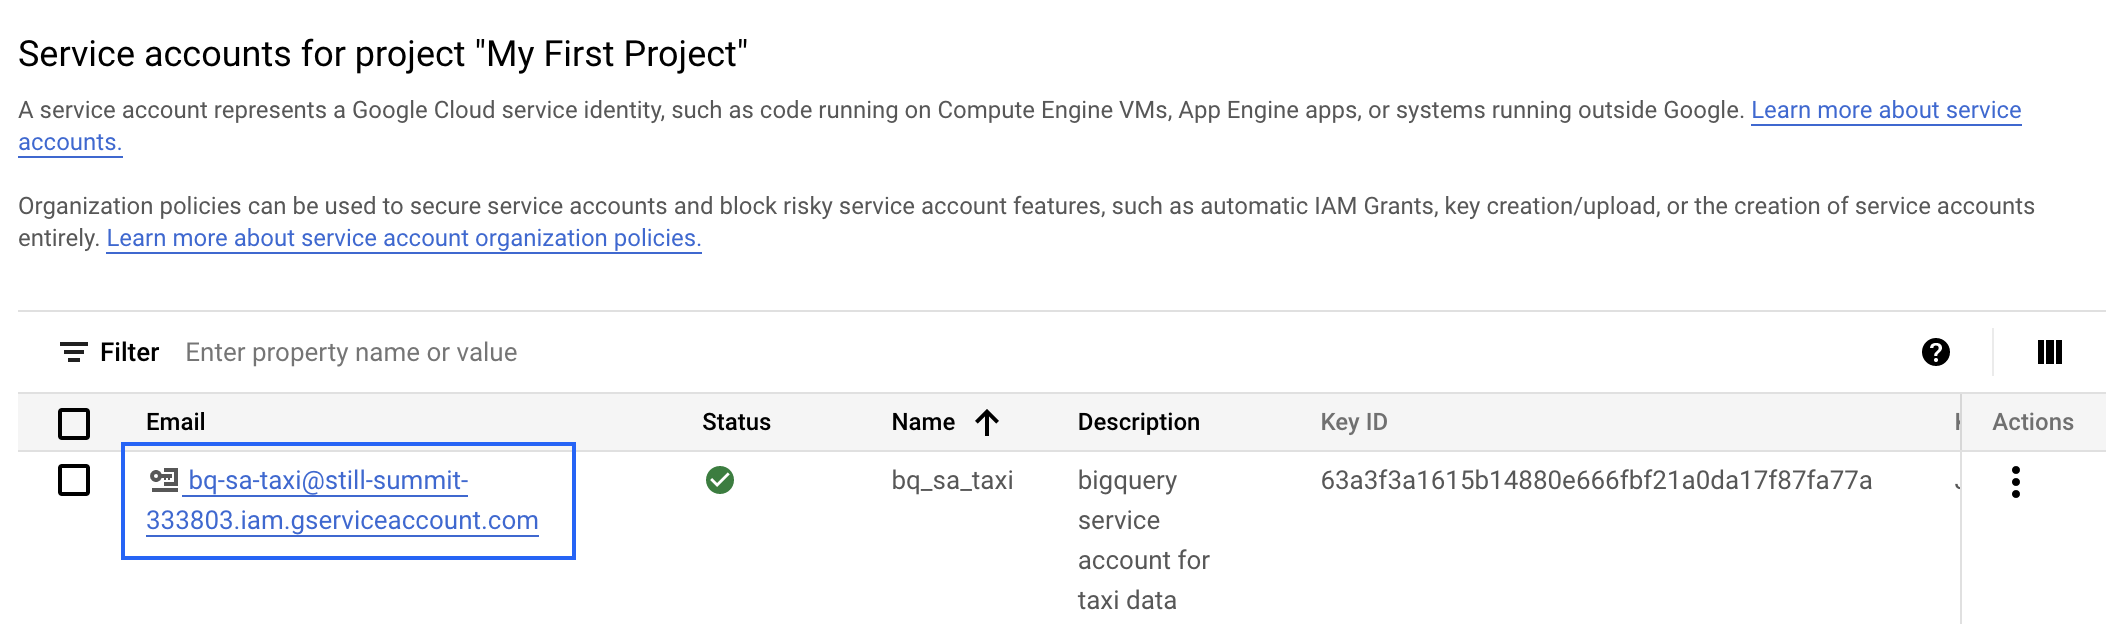
Step 2: Copy your Service Account email
The service account you use can have owner, editor or viewer privilges.
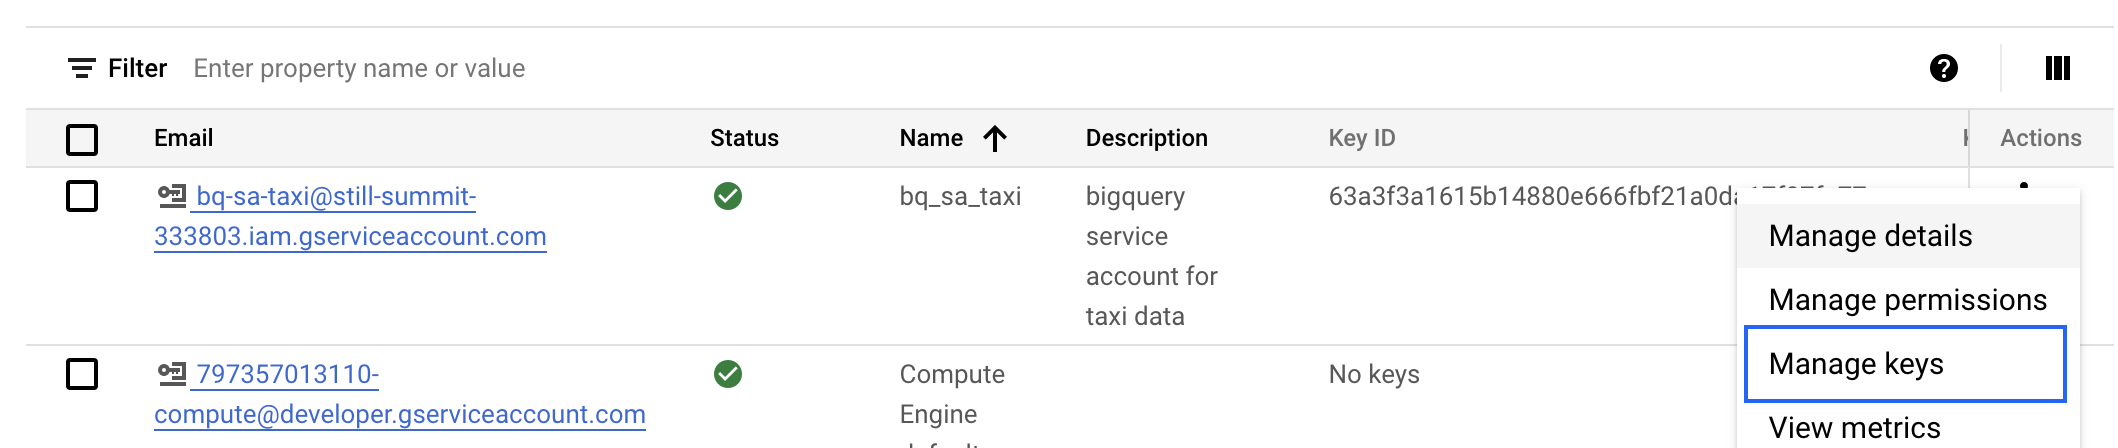
How to download your OAuthPvtKey from Google Cloud
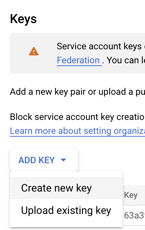
Step 1: From the Service Account screen (following the steps above), select "Manage Keys" from the drop down options
Step 2: Select “Create new key”
Step 3: Create JSON key

Where to store and access your OAuthPvtKey in Zetaris
You are able to store your OAuthPvtKey in either the local file system which the backend runs on, or in the NDP file system in the "key-trust-store" folder (after manually uploading it), e.g.
NDP file system
If on the local file system, just provide the path e.g. /path/to/file/[OAuthPvtKey].json
If from NDP file system, ensure in format like dffs:///[OAuthPvtKey].json
