
This article details how to install Zetaris Enterprise on Microsoft Azure.
Prerequisites:
- Terminal
- Helm3
- kubectl
- Azure CLI
- Download and unzip the file in the terminal
- https://installationsecret.blob.core.windows.net/secrets/Enterprise_on_azure.zip
- To download on terminal use the command below:
-
curl https://installationsecret.blob.core.windows.net/secrets/Enterprise_on_azure.zip --output Enterprise_on_azure.zip
-
- To unzip use:
-
-
-
sudo yum install unzip
-
unzip Enterprise_on_azure.zip
-
-
Steps to Install
Steps 1-9: Preparing Azure resources
Step 10-15: Deploying Zetaris
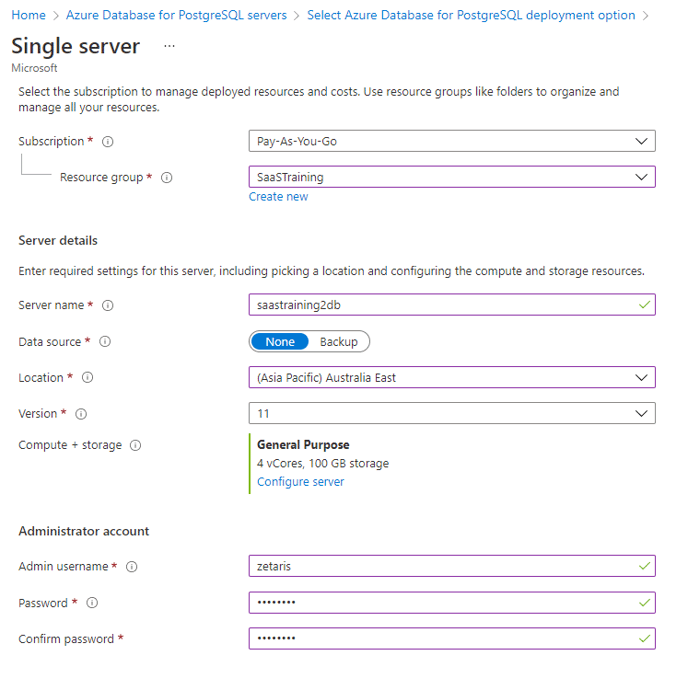
Step 1: Prepare Resource Group (usually provided by client)
Step 2: Install PostgreSQL
- Search Azure Database for PostgreSQL server
- Click on create and choose single server
-
-
Resource Group → the resource group created for installation
-
Server Name → choose server name
-
Location → same as Resource Group
- Click review and create
-
Try to avoid # character inside password
Step 3: Create storage account
- Search for storage account and create a storage account
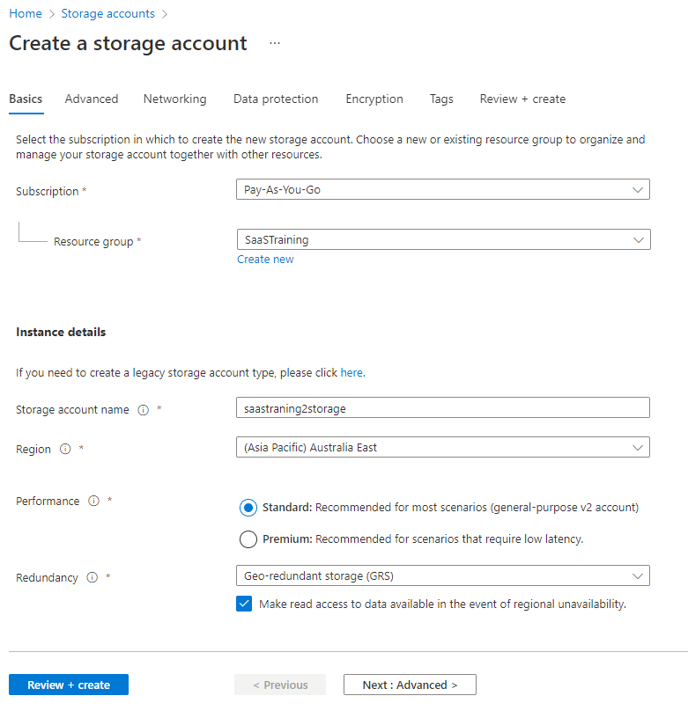
- Select the same resource group and region
- Click review + create
Step 4: Create a storage container
Once storage is created, create a storage container with the following syntax: [suffix]-cache
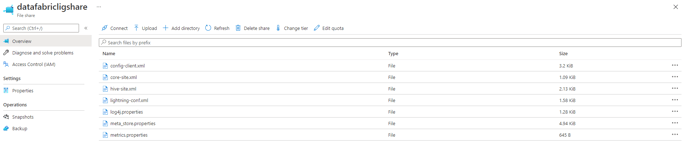
File Shares (4)
cusdatashare
-
keep it empty
datafabricligshare
-
to store config files for server deployment
-
copy all the folder structure from XXXX/config_files/servershare
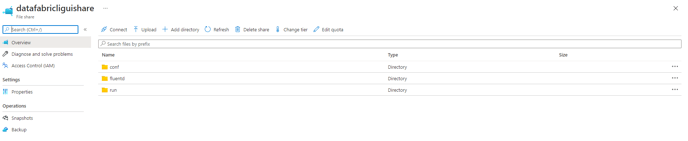
datafabricliguishare
-
to store config files for gui deployment
-
copy all the folder structure from XXXX/config_files/guishare
datafabricstreamshare
-
keep it empty
Step 5: Create log analytic workspace
- Search for log analytic workspace in azure
- resource group → the one which is created
- region → same as resource group
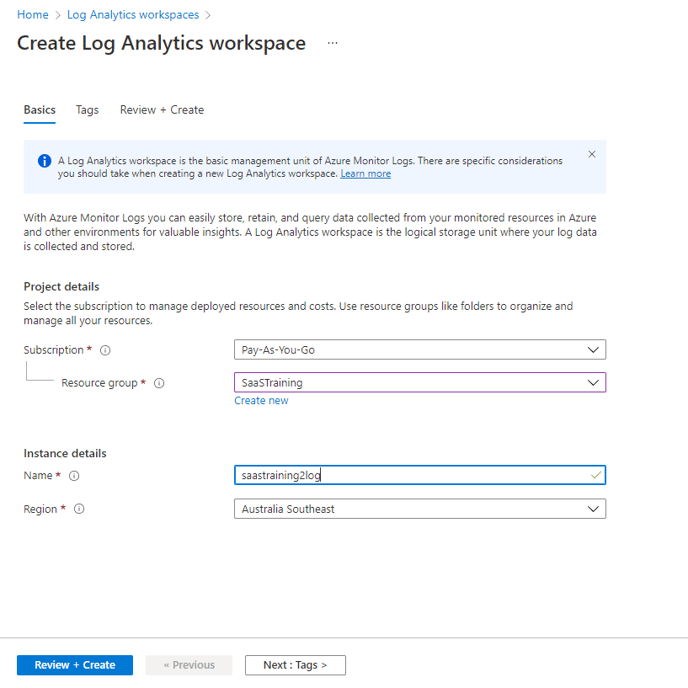
- Click review +create
- monitoring Azure statistics
Step 6: Create virtual network
- Resource group → The one which is created
- Region → same as resource group
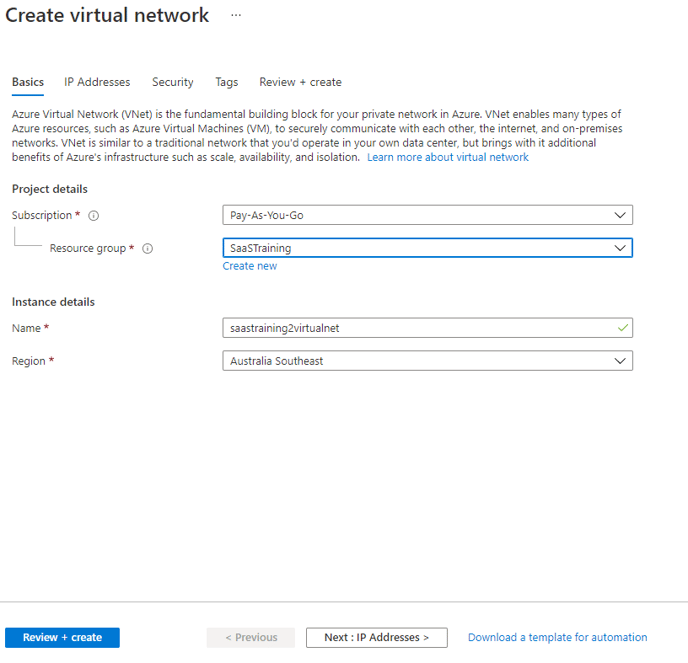
-
click on next and set Address Space - 10.1.0.0/16
-
Set Subnet
-
subnet address - 10.1.0.0/20
-
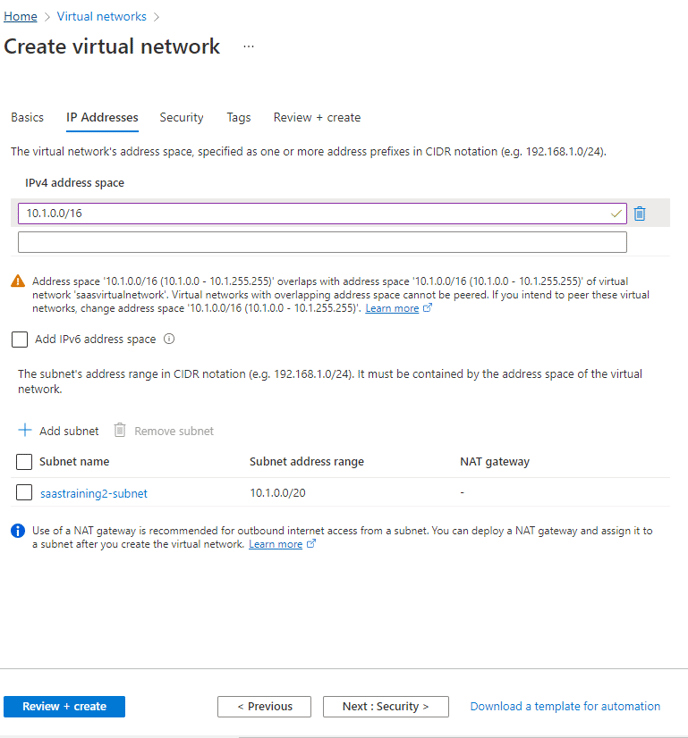
-
- Click review +create
Step 7: Create kubernetes cluster
-
Search for Kubernetes services
- Click on create kubernetes services
-
kubernetes version → 1.20.13 / 1.21.9
-
resource group → the one which is created
-
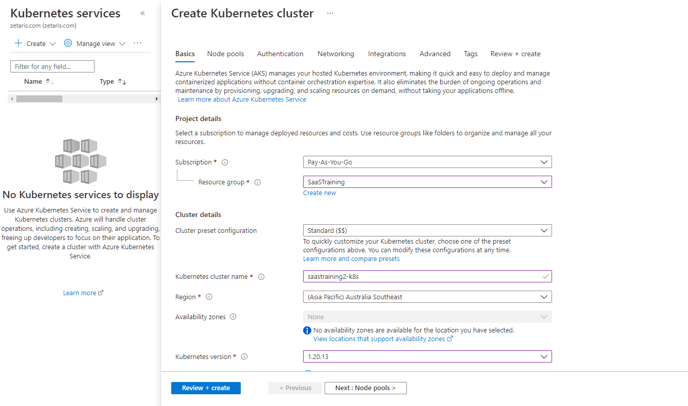
-
Click on next:Node pools -->next : Authentication
-
Keep rbac to be enabled in Authentication tab
-
Keep Authentication method as “Service principal”
-
Add your service principal client ID
-
Add your service principal client secret
-
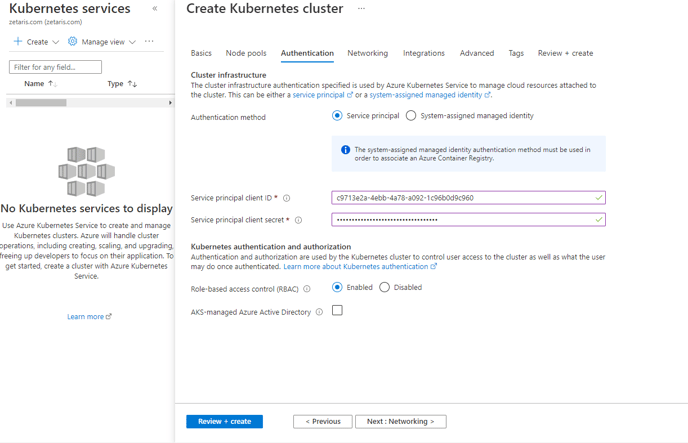
-
- Click on next: Networking
-
-
Choose "Azure CNI"
-
-
-
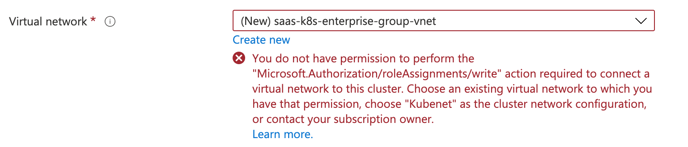
- You need to wait for getting permission from the client
-
-
-
-
Virtual network & Cluster subnet choose the one created above
-
Kubernetes service address range 10.2.32.0/20
-
Kubernetes DNS service IP address 10.2.32.2
-
Docker Bridge address 10.2.48.1/20
-
-
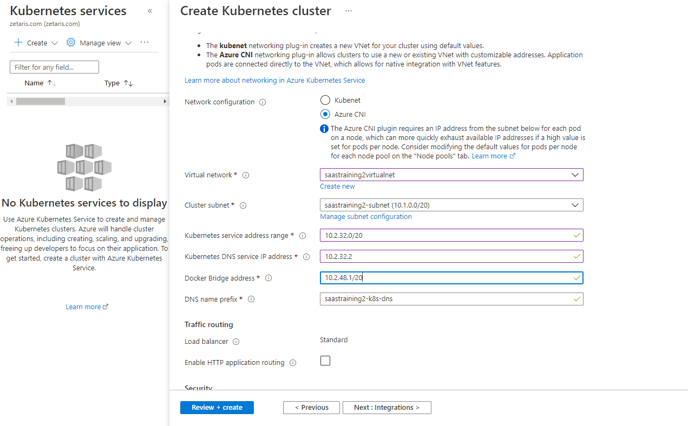
- Click on review +create
-
After k8s is created, you need to ask permission for MC_*******_<region> resource group
-
this resource group is generated with k8s cluster automatically
Frequently asked questions for Azure Kubernetes Service (AKS) - Azure Kubernetes Service -
<region> is australiaeast for example
-
Step 9: Create Public IP
-
search for Public IP address
-
click on create
-
resource group → the one which is created
-
Click on review +create
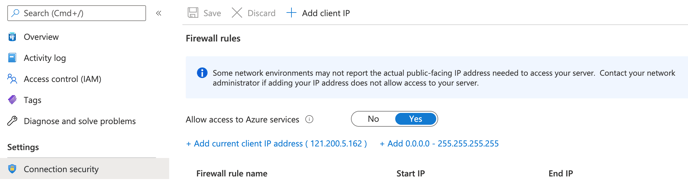
Step 10: Connect to databases using DbVisualizer/ DBeaver /Any database tool
- Under left-side Connection security, allow access to Azure services and add your own ip to firewall rules
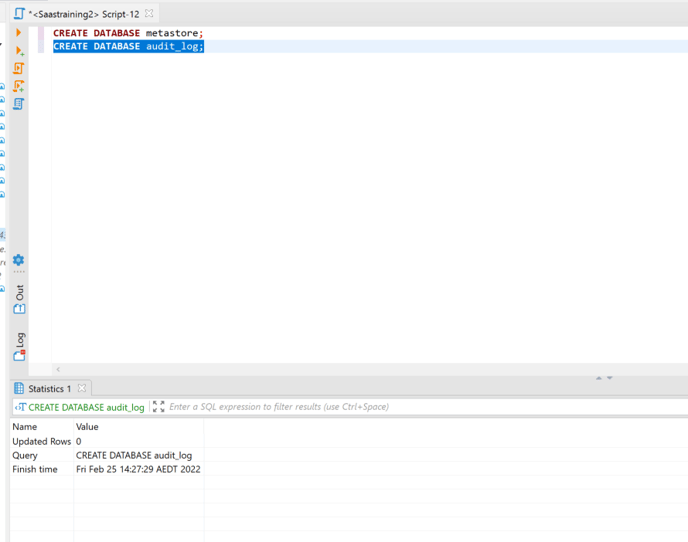
- Once the connection to the database is made, create 2 databases:
CREATE DATABASE metastore;
CREATE DATABASE audit_log;
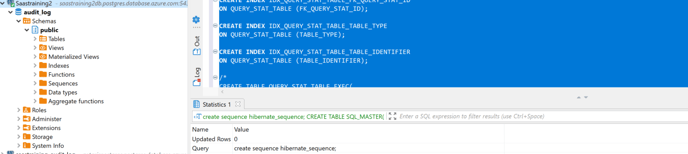
- Now connect to metastore database
-
-
Execute the the sql statements (metastore queries attached below)
-

- Now connect to audit_log database
- Execute the the sql statements (audit_log queries attached below)
Step 11: Deployment or Service
- Once k8s cluster is ready, we can do deployments OR make IP / DNS on cluster, these two parts are not sequential.
- Let’s do deployments first, but before that, we need to download kube_config to work on cluster.
- Click Connect on Azure Portal

- Run commands as instructed
az account set --subscription <subscription_id>
az aks get-credentials --resource-group <rg_name> --name <k8s_cluster_name>
You can add
--file /path_to_config/custom_kube_config
to save it as a separate config file instead of merging it into
~/.kube/config
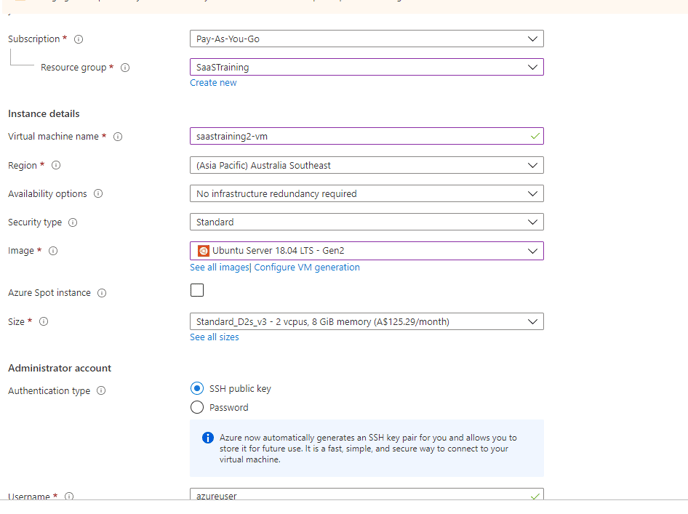
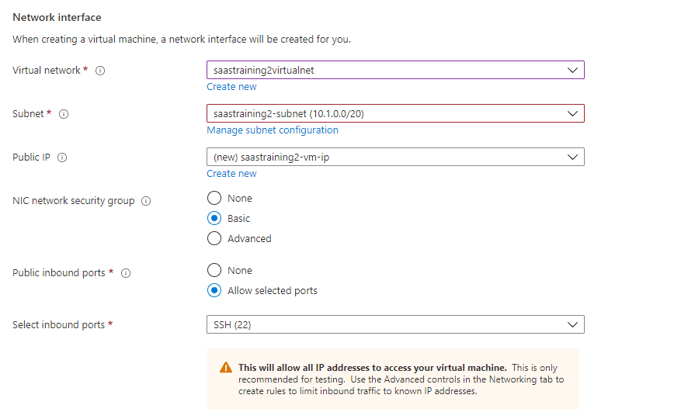
Step 12: Solr VM
-
Create a ubuntu VM
-
Use version ubuntu 18.4 or above
-
-
- Use the same virtual network as k8s service
-
- Click on create button to create virtual machine. This will download .PEM file on your machine. Keep it safe. Will be using it later.
- Modify meta_store.properties file in File Share datafabricligshare. For example the Solr VM private ip address is 10.1.0.115, change this line in meta_store.properties
solr_server=10.1.0.115:8983/solr/
-
Open terminal and run
chmod 600 xxxx.pem
to change permission
-
Using .pem file ssh to the VM. Do following once you are in the VM:
-
Run
sudo apt-get update
to update.
-
install java by using
sudo apt-get install openjdk-8-jdk.
-
Type “java -version” to see if java is installed
-

-
config java path
Find out jvm/jdk path. by default it is:
/usr/lib/jvm/java-1.8.0-openjdk-amd64
Edit .bashrc file
vi ~/.bashrc
# add this path 6export JAVA_HOME=/usr/lib/jvm/java-1.8.0-openjdk-amd64
source ~/.bashrc
to check if path is accessible:
echo $JAVA_HOME -
Download lightning server binary from s3 and running solr
mkdir /home/azureuser/solr
cd /home/azureuser/solr
wget https://zetaris-download.s3.ap-southeast-2.amazonaws.com/server/20220114/zetaris-ndp-2.1.0.1-production.tgz
tar -xf zetaris-ndp-2.1.0.1-production.tgz
rm zetaris-ndp-2.1.0.1-production.tgz
cd zetaris-ndp-2.1.0.1-production/
cp -r solr-8.6.0/ /home/azureuse/solr
rm -r zetaris-ndp-2.1.0.1-production/
cd solr-8.6.0/bin
./solr start

>> output
*** [WARN] *** Your open file limit is currently 1024.
 It should be set to 65000 to avoid operational disruption.
 If you no longer wish to see this warning, set SOLR_ULIMIT_CHECKS to false in your profile or solr.in.sh
*** [WARN] *** Your Max Processes Limit is currently 15579.
 It should be set to 65000 to avoid operational disruption.
 If you no longer wish to see this warning, set SOLR_ULIMIT_CHECKS to false in your profile or solr.in.sh
Waiting up to 180 seconds to see Solr running on port 8983 [\]
Started Solr server on port 8983 (pid=2623). Happy searching! -
Verify solr is up
-
Go to Azure portal, add inbound rules > open port 8983, then browse
<VM-public-ip>:8983
kubectl exec -it thunderstorm-driver bash
### go into bash
cd /usr/share/zetaris/lightning/conf/
vi meta_store.properties

# to verify solr private ip has been applied by comparing solr private ip
-
-
Step 13: Deployment
- Click Connect on Azure Portal

-
Run commands as instructed
az account set --subscription <subscription_id>
az aks get-credentials --resource-group <rg_name> --name <k8s_cluster_name>
You can add
--file /path_to_config/custom_kube_config
to save it as a separate config file instead of merging it into ~/.kube/config
-
Install Spark Operator, Cert Manager, Nginx-Ingress
-
Helm add repo spark-operator
-
helm repo add spark-operator spark-on-k8s-operator
- helm repo update
Our server deployment is of kind: SparkApplication, so we have to install Spark Operator first# repo add does not need --kubeconfig
helm repo add spark-operator https://googlecloudplatform.github.io/spark-on-k8s-operator
helm repo add jetstack https://charts.jetstack.io
helm repo add ingress-nginx https://kubernetes.github.io/ingress-nginx
helm repo update
helm --kubeconfig /path_to_config/kube_config_name \
install spark-operator \
spark-operator/spark-operator \
--namespace spark-operator --create-namespace \
--set webhook.enable=true \
--version 1.1.6
kubectl --kubeconfig create namespace cert-manager
kubectl --kubeconfig label namespace cert-manager certmanager.k8s.io/disable-validation=true
helm --kubeconfig install \
cert-manager jetstack/cert-manager \
--namespace cert-manager \
--version v1.6.0 \
--set installCRDs=true
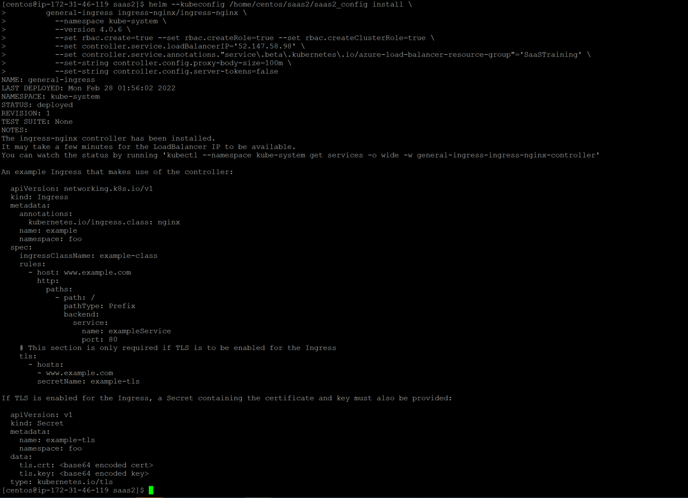
helm --kubeconfig install \
general-ingress ingress-nginx/ingress-nginx \
--namespace kube-system \
--version 4.0.6 \
--set rbac.create=true --set rbac.createRole=true --set rbac.createClusterRole=true \
--set controller.service.loadBalancerIP='' \
--set controller.service.annotations."service\.beta\.kubernetes\.io/azure-load-balancer-resource-group"='' \
--set-string controller.config.proxy-body-size=100m \
--set-string controller.config.server-tokens=false
-
Cert Manager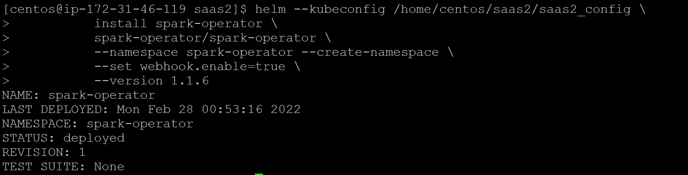
Ingress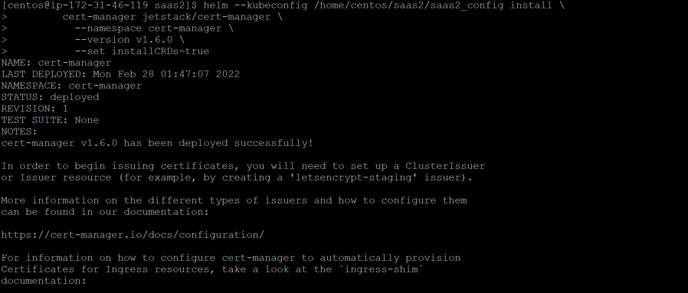
-
- Apply Secret yaml files
- Open secrets.yml file
- You will see <Change Here> in line 18,19 and 20-->
 Base64 Decode and Encode - Online
- in line 18--> add your storage name for example enterprisetraning2storage
- in line 19--> add your account storage name but encoded using base64

-
-
- in line 20--> add your account storage key but encoded using base64
-
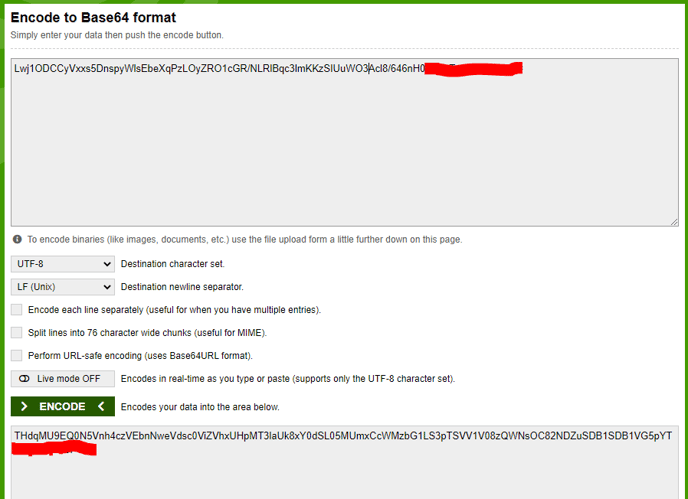

-
-
- Once the file is modified with storagename , storagename in base64 and storagekey in base64 then run
kubectl --kubeconfig /path of config/name_of_config apply -f secrets.yml
- Once the file is modified with storagename , storagename in base64 and storagekey in base64 then run
-
- Upload deployment config files into relevant File share
-
go to you storage container in azure
-
open file shares
-
open datafabricligshare
-
edit meta_store_properties
-
update connection details of metastore with detail of your database created in above steps
-
update connection details of audit_log with detail of your database created in above steps
-
-

-
-
- update the container name and azure blob access key and secret key

- update the container name and azure blob access key and secret key
-
- Apply gui deployment file
-
open terminal where your yaml files are stored and go to XXX/01_deploy folder
-
Run
kubectl --kubeconfig /path to config/cofig_name apply -f gui-deployment.yaml
- Use kubectl get pod to see if gui is successfully deployed:
kubectl --kubeconfig /path to config/cofig_name get pod

- if status is not running, use kubectl get pod/thunderstorm-gui-****** to see if image is pulled successfully
-
kubectl --kubeconfig /path to config/cofig_name get pod/thunderstorm-gui-*****
-
-
-
Apply server deployment file
-
Same step as done for gui deployment
-
instead of uning gui-deployment.yaml use server-deployment.yaml
-
-
If thunderstorm-driver does not run that Additional step is to use kubectl logs -f pod/thunderstorm-driver to see logs
-
If you see missing table [table_name], you should add tables in Azure Postgres
-
If you see missing settings, please update meta_store.properties inside datafabricligshare - File share to store server deployment config
-
-
Step 14: Service
- Apply cluster issuer
- open terminal and got folder xxx/yaml_files
- vi ca-issuer.yml
- put your email where change email id is mentioned
- save the file
- run
- Cluster issuer which is used to generate Certificate
kubectl --kubeconfig apply -f ca-issuer.yml
- Cluster issuer which is used to generate Certificate
- service yaml files
-
Add DNS record
-
Record name *.SUBDOMAIN.DOMAIN
-
Record type A
-
value is public static IP inside the k8s auto-created Resource Group
the image below is an example, subdomain is enterprise, and domain is zetaris.com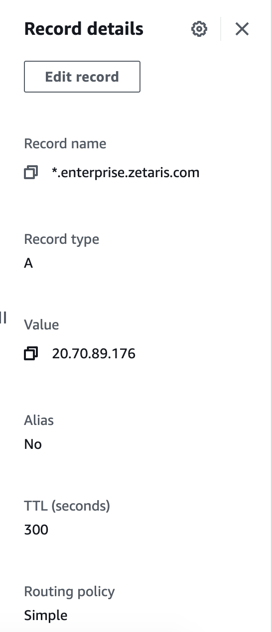 Example of DNS record
-
-
Modify the url (host field) inside gui / server / admin gui
-
Apply yaml files
-
gui
-
Go to folder xxx/02_service
-
vi gui-service.yaml
-
change line 20 and 23 (where CHANGE HERE is mention)
-
in line 20-> add ui.subdomain.domain for example we create enterprise as subdomain and zetaris .com as domain so final edit will be ui.enterprise.zetaris.com
-
in line 23 -->make same change as line 20
-
-
-
server
-
Go to folder xxx/02_service
-
vi server-service.yaml
-
change line 20 and 23( where CHANGE HERE is mention)
-
in line 18-> add rest.subdomain.domain for example we create enterprise as subdomain and zetaris .com as domain so final edit will be rest.enterprise.zetaris.com
-
in line 21 -->make same change as line 18
-
-
-
-
Step 15: Creating account on lightning
-
-
open terminal
-
run command
kubectl --kubeconfig /path to config/config_name exec -it thunderstorm-driver bash
-
then run command
cd /usr/share/zetaris/lightning/bin
-
once you are in bin folder run command
-
modify dev.account.sh file
printf "First Name\tSurname\tEmail\tTeam(org name)\tPassword\nDev,Account,dev@account.com,Account,password" >> $devOrg

Change to

printf "First Name\tSurname\tEmail\tTeam(org name)\tPassword\n{YOUR_FIRST_NAME},{YOUR_SURNAME},{YOUR_EMAIL},{YOUR_ORG_NAME},{YOUR_PASSWORD}" >> $devOrg

Note that YOUR_EMAIL is the admin level -
./dev-account.sh
-
mod
-
once the site open login to it with credentials
-
username → YOUR_EMAIL (by default → dev@account.com)
-
password → YOUR_PASSWORD (by default → password)
-
-
-