Prerequisites:
-
Valid
Github repository required at the customer site
Setting up Git Repository and Gathering Credentials
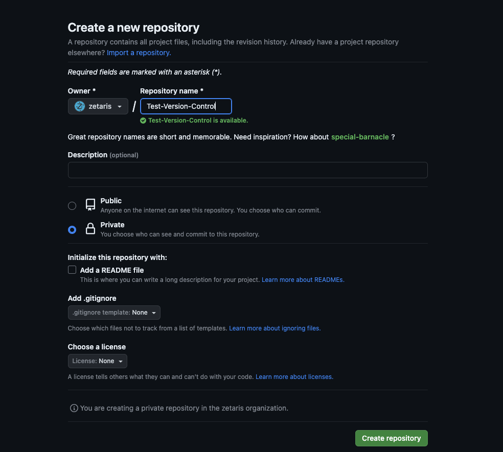
1. Create an empty GitHub repository from GitHub Home Page with the default branch named "main" under your organisation's account.
2. Generate a new token by visiting https://github.com/settings/tokens - Connect your Github account and selecting "Generate new token" → "Generate new token (classic)." Assign an appropriate name to the token and configure the necessary permissions.
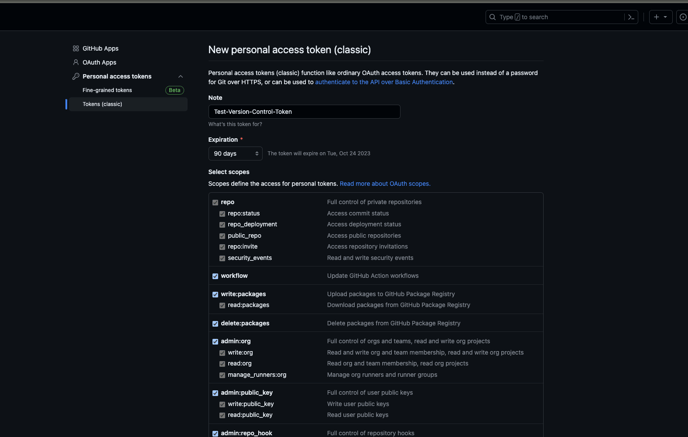
3. Please make sure to store the token along with the following details: branch named 'main', owner (in this case 'Zetaris'), repository name (in this case 'Test-Version-Control'), and the GitHub API/FILE URL as <https://api.github.com/repos/<owner>/<repo-name>/contents/>.
Setting up Automated Airflow for Full Backup & Full/Partial Restore
This Airflow Directed Acyclic Graph (DAG) streamlines the automation of backup and restore processes for the Zetaris platform by utilizing a JSON configuration file. By simply modifying a single config.json file, you can effortlessly toggle between full and partial backup and restore operations.
📁 File Structure
zetaris-backup-restore/
├── dags/
│   ├── dag_backup_restore.py        # Main Airflow DAG for backup/restore
│   ├── BackupRestoreWrapper.py      # Python logic wrapper for API interactions
│   ├── config.json                  # Config to control backup/restore (edit this only)
│   ├── github_handler.py            # Handles GitHub push/pull logic
│   ├── zetaris_handler.py           # Handles Zetaris API operations
│   ├── __init__.py                  # Makes the folder a Python module
├── utils/
│   ├── logger.py                    # Custom logging setup (optional)
│   └── common.py                    # Shared utility functions
├── README.md                        # Complete setup instructions
└── requirements.txt                 # Python dependencies for the Airflow DAG
⚙️ Step 1: Create Your config.json
This table provides guidance for setting up the configuration file according to the specified instructions.
|
Variable Name |
Value |
|---|---|
|
MODE |
Type of Operation Required (Backup/Restore) |
|
USERNAME |
your_email@zetaris.com |
|
PASSWORD |
Your zetaris Password |
|
API_URL |
https://api.yourdomain.example.zetaris.com (sass/qa etc) |
|
ORGID |
Your Zetaris Account Organization ID |
|
METASTORE |
Name of the Metastore Table (typically referred to as 'metastore') |
|
GITHUB TOKEN |
A Classic GitHub Token is required to access the Git repository. You can create this token in the GitHub Developer Settings. |
|
GIT HUB REPO URL |
https://api.github.com/repos/zetaris/xxx- VersionControl (This is a sample URL. You can customize it according to your needs by adding the appropriate repository path after https://api.github.com/repos/.) |
|
BACKUP TYPE |
Both full and partial backup options are available, and the same applies for restoring—whether it's a full or partial restore. |
|
PARTIAL OPTIONS |
If the backup type is set to "full," this field should be left as null. However, if performing a partial backup or restore, you can specify options such as ["data_marts", "pipeline_containers","Schema views"] or choose from pipelines, data_marts, or permanent_views as applicable. |
Place this file in the same folder as dag_backup_restore.py.
🔁 Full Backup Example
{
  "mode": "backup",
  "username": "your_email@zetaris.com",
  "password": "your_password",
  "api_url": "https://api.saas.example.zetaris.com",
  "orgid": "123456",
  "metastore": "metastore",
  "github_token": "ghp_xxxxxxxxxxxxxxxxxxxxx",
  "github_repo_url": "https://api.github.com/repos/zetaris/xxx-VersionControl",
  "backup_type": "full",
  "partial_options": null
}
🔁 Partial Backup Example
{
  "mode": "backup",
  "username": "your_email@zetaris.com",
  "password": "your_password",
  "api_url": "https://api.saas.example.zetaris.com",
  "orgid": "123456",
  "metastore": "metastore",
  "github_token": "ghp_xxxxxxxxxxxxxxxxxxxxx",
  "github_repo_url": "https://api.github.com/repos/zetaris/xxx-VersionControl",
  "backup_type": "partial",
  "partial_options": ["data_marts", "pipeline_containers"]
}
🔁 Full Restore Example
{
  "mode": "restore",
  "username": "your_email@zetaris.com",
  "password": "your_password",
  "api_url": "https://api.saas.example.zetaris.com",
  "orgid": "123456",
  "metastore": "metastore",
  "github_token": "ghp_xxxxxxxxxxxxxxxxxxxxx",
  "github_repo_url": "https://api.github.com/repos/zetaris/xxx-VersionControl",
  "backup_type": "full",
  "partial_options": null
}
🔁 Partial Restore Example
{
  "mode": "restore",
  "username": "your_email@zetaris.com",
  "password": "your_password",
  "api_url": "https://api.example.enterprise.zetaris.com",
  "orgid": "123456",
  "metastore": "metastore",
  "github_token": "ghp_xxxxxxxxxxxxxxxxxxxxx",
  "github_repo_url": "https://api.github.com/repos/zetaris/xxx-VersionControl",
  "backup_type": "partial",
  "partial_options": {
    "all_data_marts": null
  }
}
🕐 Step 2: Set the Schedule (Crontab Format)
To configure the DAG to execute daily at 7 AM, locate and open the `dag_backup_restore.py` file, then modify the following line:
schedule_interval='@daily'
To:
schedule_interval='0 7 * * *'
📧 Step 3: Set Up Email Notifications (Optional)
You can activate email notifications by modifying the `default_args` section in the main DAG script file. Additionally, to set up notifications for both Slack and email, you will need to define the relevant variables.
Notification_user_email = Variable.get('notification_user_email')
SLACK_WEBHOOK_URL = Variable.get('notification_webhook_url')
default_args = {
    'owner': 'airflow',
    'start_date': datetime(2024, 1, 1),
    'retries': 1,
    'email': [notification_user_email],            # Optional: failure notifications
    'email_on_failure': True,
    'email_on_retry': False,
    'on_failure_callback': lambda context: slack_notify(context, status="❌ Failed"),
    'on_success_callback': lambda context: slack_notify(context, status="✅ Succeeded"),

}
Ensure SMTP is properly configured in airflow.cfg or via environment variables.
🔐 Step 4: Use Airflow Variables (Optional)
To avoid hardcoding sensitive data like credentials, you can store them in Airflow variables:
airflow variables set zetaris_config '{"username": "...", "password": "..."}'
Then modify your DAG to load:
from airflow.models import Variable
import json

json_config = json.loads(Variable.get("zetaris_config"))
If you're using config.json, this step is optional.
✅ Step 5: Deploy and Trigger the DAG
- Place all files in your
dags/folder. - Restart Airflow services if needed:
airflow dags reload - Trigger manually or wait for the scheduled run:
airflow dags trigger zetaris_backup_restore
✅ Summary
| Feature | Support |
|---|---|
| Full Backup/Restore | ✅ |
| Partial Backup/Restore | ✅ |
| JSON-based Config | ✅ |
| Airflow Schedule | ✅ |
| Email Notification | ✅ |
| Airflow Variables | ✅ (optional) |
Setting up Notifications via Slack and Teams
1. To setup teams notifications, follow the below steps:
-
Configuring webhook in Microsoft teams
-
Open up teams, browse to the channel you would like to configure messages to be sent to
-
click the … beside the channel name then select Connectors
-
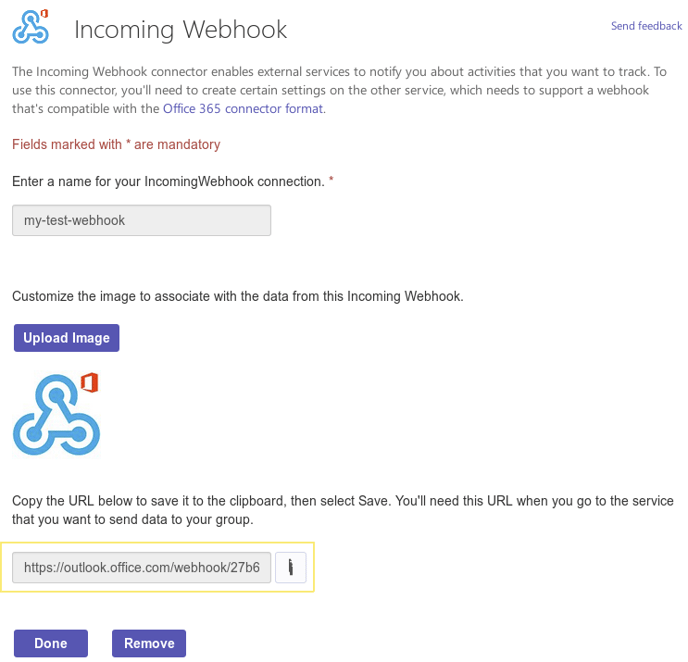
Search for Incoming Webhook.
-
Click Configure, provide a webhook name and select Create. A Webhook URL will be generated.
-
On the Airflow UI, click on Admin and click on connections from the dropdown list
-
Click on Add and add the respective parameters as shown below in the image and name the conn_id as ‘msteams_webhook_url’
2. To setup slack notifications, follow the below steps:
-
Create a Slack app if you don’t have already

- Enable Slack notifications for your channel,
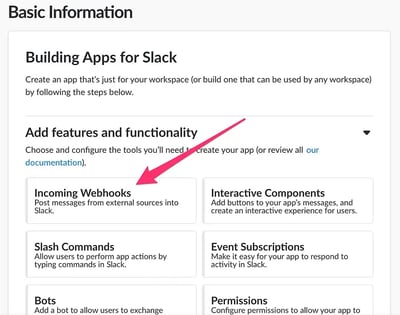
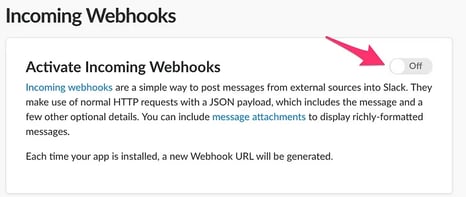
- Create an Incoming Webhook by clicking on Add New Webhook to Workspace on the same page
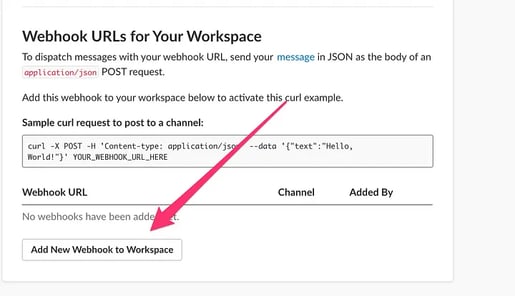
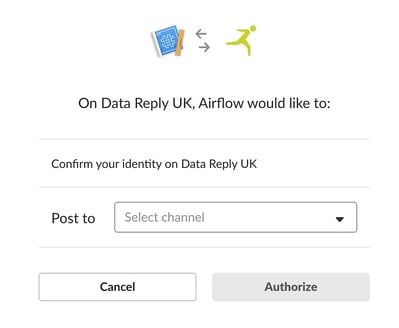
- So go ahead and pick a channel that the app will post to, and then click to Authorize your app. You’ll be sent back to your app settings, and you should now see a new entry under the Webhook URLs for Your Workspace section, with a Webhook URL that’ll look something like this:
https://hooks.slack.com/services/T00000000/B00000000/XXXXXXXXXXXXXXXXXXXXXXXX
3. After setting up the airflow and defining the necessary variables, you are all set to execute the 'Zetaris_backup_restore`
Example of different objects on Zetaris Lightning below: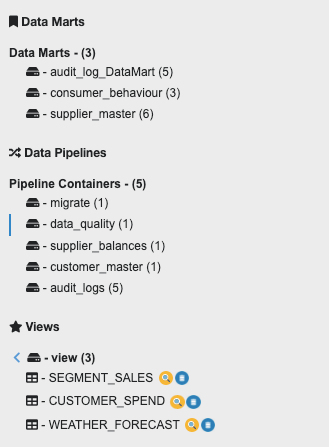
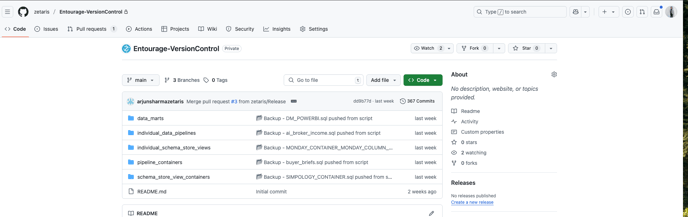
Example of backups of the different objects on GITHUB below:
Walkthrough of Version Control Process (Video)