Steps to Create a Virtual Data Mart
-
Login to Zetaris
-
Go to the Virtual Data Mart tab


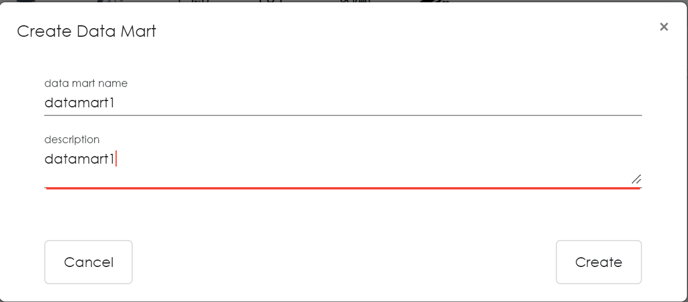
4. A pop-up will appear. Fill in the details and click the "Create" button
7. This will save your data mart for future use.
Steps to Delete a Virtual Data Mart
-
Login to Zetaris
-
Go to the Virtual Data Mart tab


4. Click on the bin to delete a particular Data Mart.
5. The Data Mart will be deleted.
Steps to Update a Virtual Data Mart
-
Login to Zetaris
-
Go to the Virtual Data Mart tab.

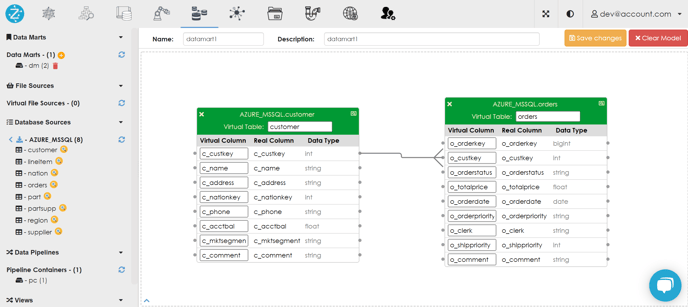
3. On the left pane, under Data Marts, all the available Data Marts are listed.

5. After clicking, the middle pane will show the data sources in that data mart.
6. Simply drag and drop more tables as required. The "Clear model" button can also be used to clear the model completely so you can start afresh.