
Prerequisites
-
Unix machine (recommended Ubuntu image)
-
Postgres-client (to create the underlying Zetaris metastore tables)
-
Ubuntu
sudo apt-get update
sudo apt-get install postgresql-client
-
-
gcloud beta component
gcloud components install beta
-
gcloud cloud proxy (
About the Cloud SQL Auth proxy | Cloud SQL for PostgreSQL | Google Cloud )
-
GCP Project with the following:
-
API's enabled. Reference link for details--> (
Getting started | Cloud APIs | Google Cloud )
-
Cloud Logging API
-
Cloud Monitoring API
-
Cloud Compute Engine API
-
Cloud Filestore API
-
Cloud SQL Admin API
-
BigQuery Connection API (?)
-
Kubernetes Engine API
-
Linked Billing Account
-
-
-
Service Account with the following granted roles.
-
Reference this link to create a service account for the GKE (provisioned in step 1)(
-
Cloud SQL Admin / Connection User
-
Kubernetes Engine Service Agent
-
Filestore Editor
-
-
Download installation scripts/helm charts/secrets (
https://github.com/zetaris/ContinuousDeployment/tree/main/GCP - Connect to preview )
You will need to copy the above installation files to the home directory “~/ “ into target Unix box creating as part of pre-requisite.
This activity can be carried out using WinSCP or scp
Installation Steps
1. Provision resources on GCP
-
Copy or move the cloud_sql_proxy file to:
~/GCP/installation_scripts
-
Run the following commands to begin provisioning resources
cd ~/GCP/installation_scripts
. gcloud-resource.sh -
Complete the following steps:
-
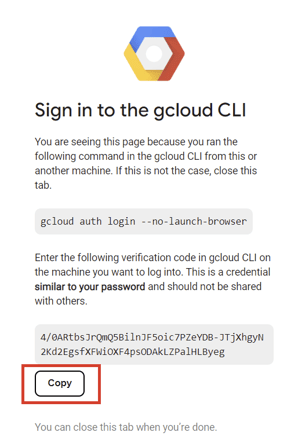
Copy the generated url and allow Google SDK to login

-
Copy the generated token from your browser and paste it in your terminal window

-
Enter your project id when prompted
-
Enter the zone for your project when prompted
-
Enter your GKE Service Account email when prompted
-
Enter your username when prompted

-
2. Add Node Pool IP Addresses to SQL Instance
-
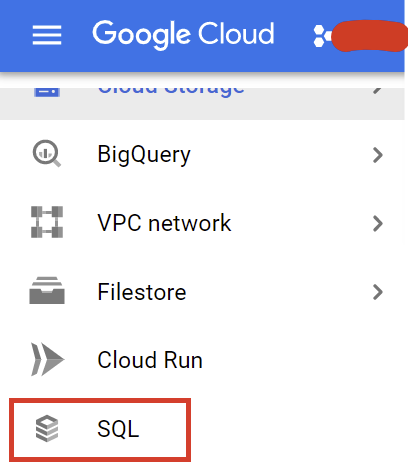
Open console.cloud.google.com in your browser
-
Navigate to your Project
-
In the left-hand resource panel select SQL
-
Click on the prod-instance SQL instance
-
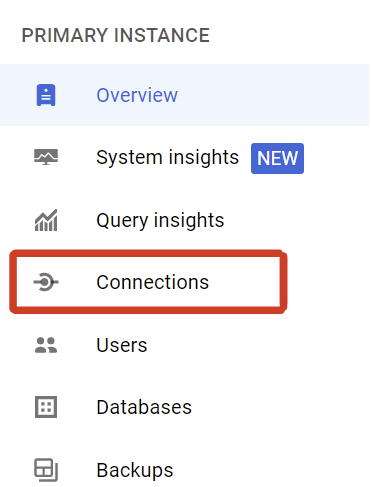
Select connections in the left-hand PRIMARY INSTANCE navigation panel
-
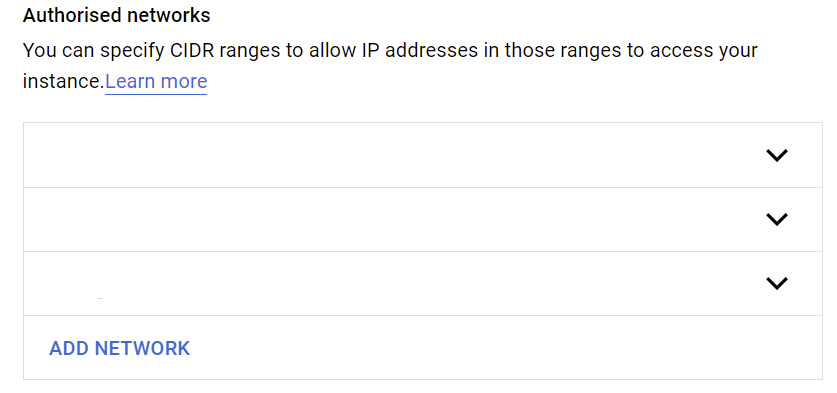
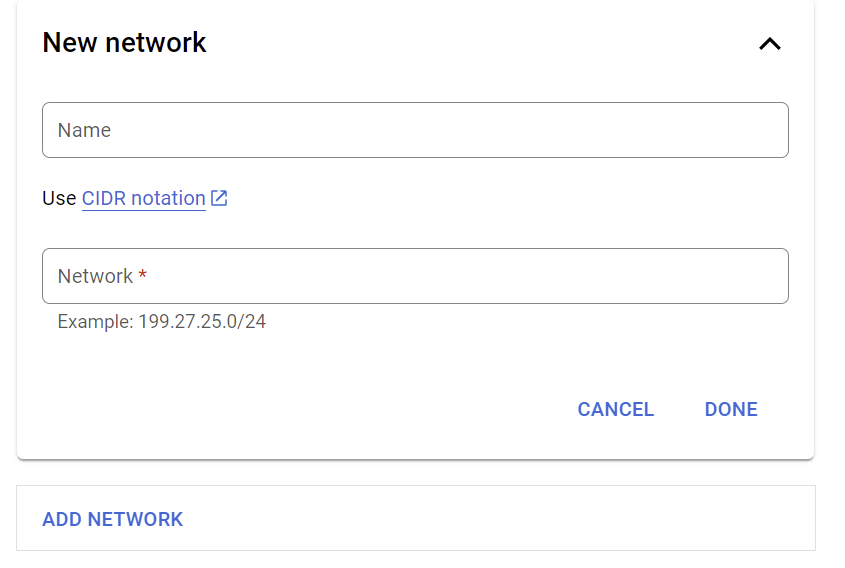
Scroll down to Authorised Networks and click on Add Network for each of the provided IP’s in the console
-
Provided GKE IP Addresses Example

-
Adding IP addresses to Authorised Networks
-
-
Click on Save at the bottom of the page and wait for it to update
3. Populating the databases
The below script will run a set of CREATE commands to generate the DDLs for the Zetaris metastore
- Run the following command to populate the databases:
. database-configuration.sh
4. Configuring the RHEL-VM
The RHEL-VM is a standalone Red hat box used for investigation of logs or inspection of pods using kubectl. This box contains the installation scripts for kubernetes and includes helm charts , configurations and secrets for the kubernetes deployments.
-
Run the following command:
gcloud compute ssh new-rhel-vm --command=”. configvm-1.sh” -- -t --zone=<the same zone as provided in step 1.2.d>
-
Please select yes on any prompts for package installation to allow for a working installation
-
The script will do the following:
-
Install the latest epel release for rhel 8
-
Install snapd
-
Create system link between snapd and snap
-
-
-
When the script has finished, Run the following command:
gcloud compute ssh new-rhel-vm --zone=<the same zone as provided in step 1.2.d> --command=”. configvm-2.sh” -- -t
-
As above, please select y on any prompts for package installation to allow for a working installation
-
The script will do the following packages:
-
Update any installed gcloud components to the latest version
-
Install helm
-
Install kubectl
-
Install the gcloud auth plugin
-
Add the gcloud auth plugin to ~/.bashrc to be used by the environment
-
-
5. Deploy Lightning on GKE
In this step , the helm charts are applied to the previously created GKE (in step 1) and all secrets and configurations are applied to the services.
-
Run the following command to deploy Lightning on GKE:
gcloud compute ssh new-rhel-vm --zone=<the same zone as provided in step 1.2.d> --command=”. config-kubernetes.sh” -- -t
-
As in Step 1.2. complete the following
-
Copy the generated url and allow Google SDK to login
-
Copy the generated token from your browser and paste it in your terminal window
-
-
When prompted provide your docker username and docker password
-
Once completed you will be provided with a list of the services running on Kubernetes. Please copy the External IP from the following services:
-
lightning-gui-svc
-
lightning-rest-svc
-
6. Associate your LoadBalancer IP addresses with an A DNS record set
To create a standard web url , the loadbalancer IPs will need to be associated with a DNS record set.
-
On your DNS provider, Create an A record set for each of the copied IP addresses from steps 5.4.a and 5.4.b
-
lightning-gui-svc: ui.<subdomain>.<domain>
i.e. ui.trial.enterprise.zetaris.com -
lightning-rest-svc: rest.<subdomain>.<domain>
i.e. rest.trial.enterprise.zetaris.com
-
7. Add certificate
In case the web url is required to have a signed certificate then use the steps mentioned in the reference document below to create a certificate: 
8. Connecting to your environment
-
Once you have the DNS pointing towards the IP addresses copied from step 5.4.1 and 5.4.2
-
This can be checked using the following link: https://dnschecker.org/
-
-
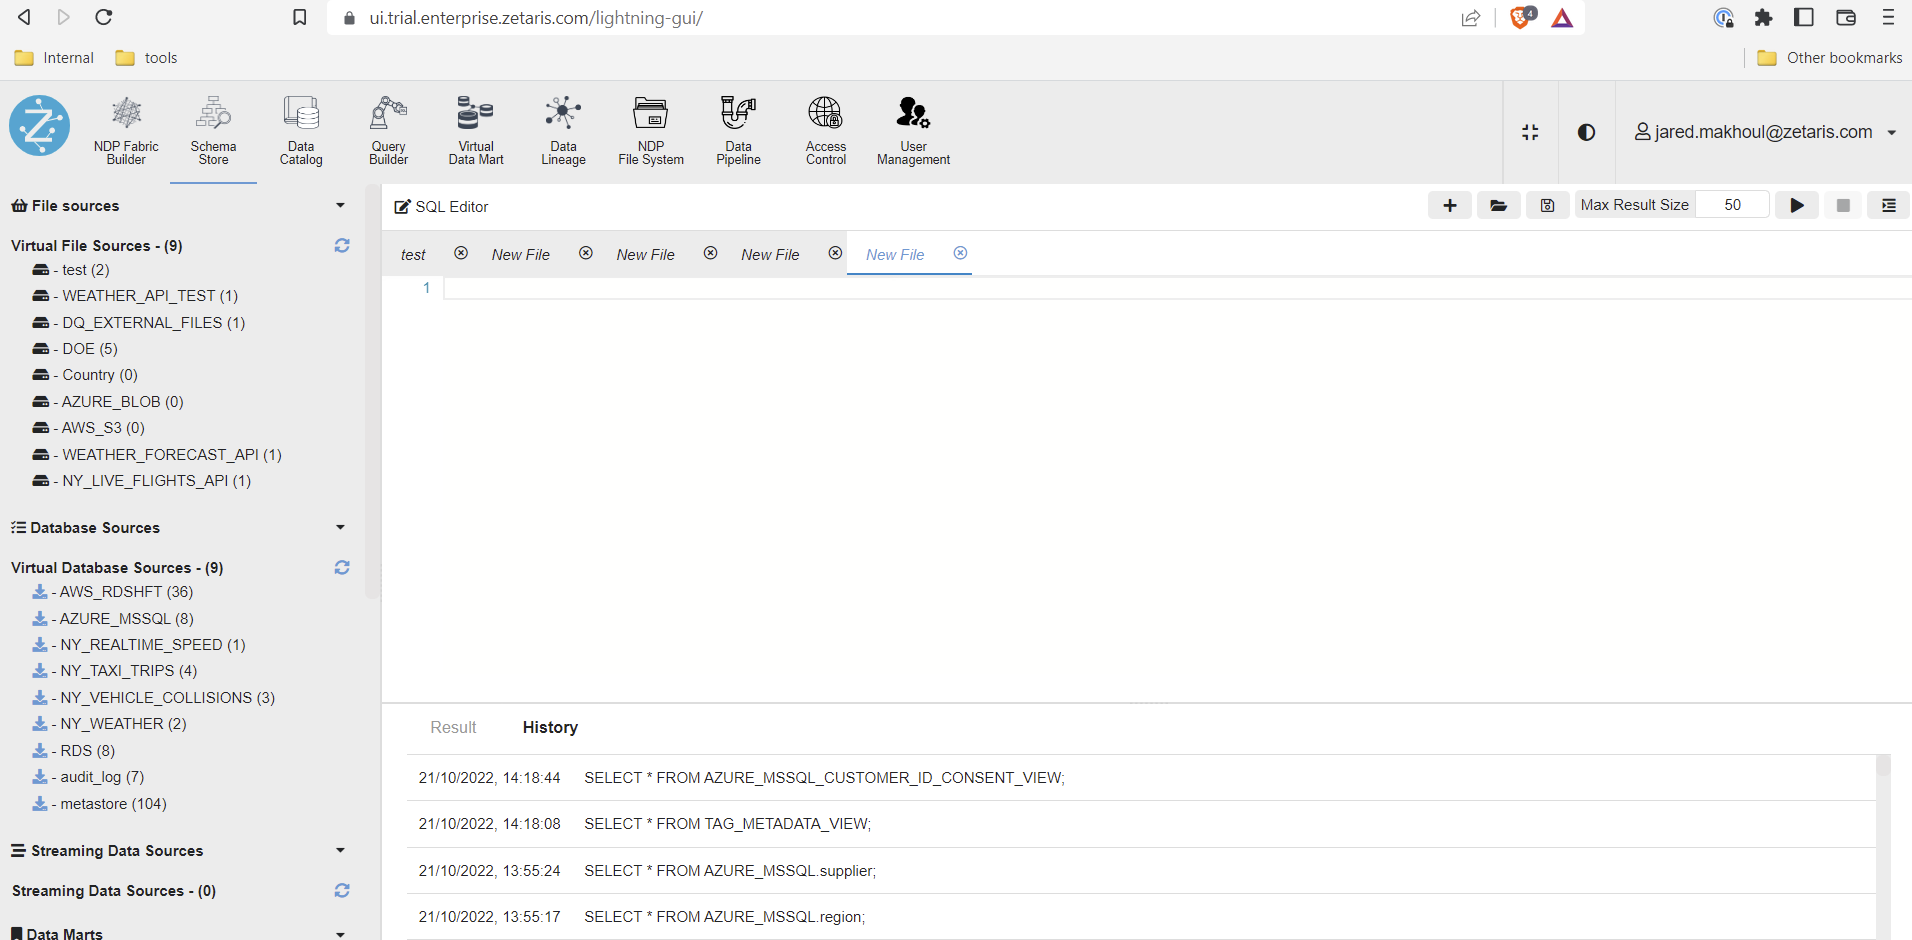
Using your browser, connect to the URL you designated for the UI
-
Login into the Lightning GUI
Installation Videos
The following installation videos demonstrate Steps 1 to 5 and Step 8.2 - 8.3