Controlling access to raw, aggregated or joined tables is done through the Access Control widget.
Provision access to Databases, Data sources, Data-marts, Pipelines, and Views for users and roles.
BEST PRACTICE
If you can, provision access at the Role level, as this makes for successful ongoing user management. i.e. when a user is onboarded into a company, they are placed into a Role, and that role already has predefined data access measures in place. Further, managing a handful of roles is easier than managing hundreds of users.
Assign Users/Roles to Data
Modify user or role access associated with Databases, Data sources, Data-marts, Pipelines, and/or Views by following the below steps.
-
Select Database, Data source, Data-mart, Pipeline, or View
-
Using Assign and Revoke, manage your users and role who have access
-
Click Apply
Select and Insert permissions
You are then able to modify what level of access that user or role is given through Select and Insert
-
Click on a user or role for which you want to next configure access to tables and a window shall pop up.
-
Either click on the checkbox beside SELECT to grant select privilege on all tables or check separate checkboxes to grant select privilege on the corresponding table.
-
Either click on the checkbox beside INSERT to grant insert privilege on all tables or check separate checkboxes to grant insert privilege on the corresponding table.
-
Click Apply.
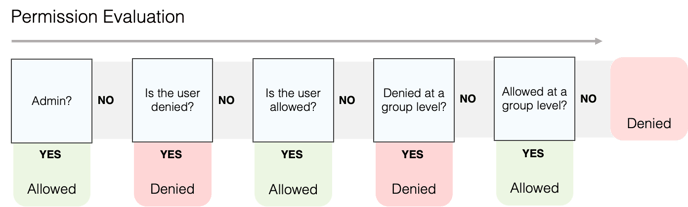
Permission Hierarchy
User and role data access are explicitly configured, unless a user is granted access, they will be denied access to data.
The below diagram show the logic in permission evaluation.
Step to assign permission to roles
-
Login to Zetaris
-
Go to access management tab
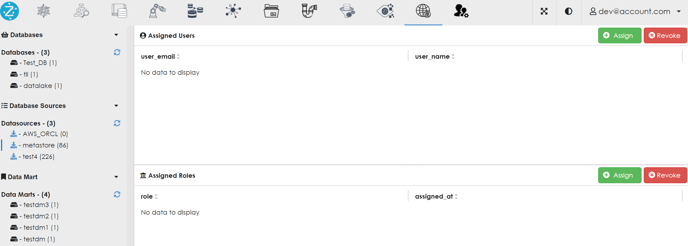
4. Click on assign button for assigned roles.

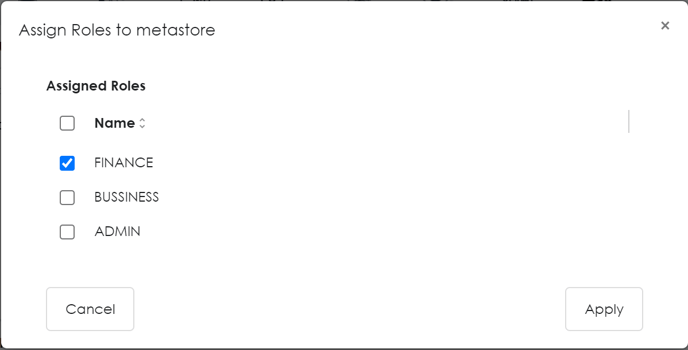
5. After clicking on "Assign" all the available roles will appear. Select the role you want to assign to a particular data source / file source. Then click "Apply."
6. The role will be assigned to particular data source / file source 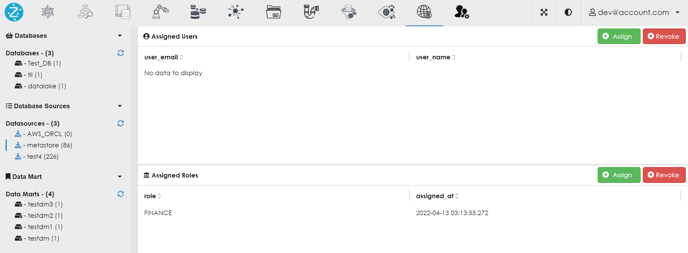 7. Now click on the role which you have just assigned. Pop-up will appear.
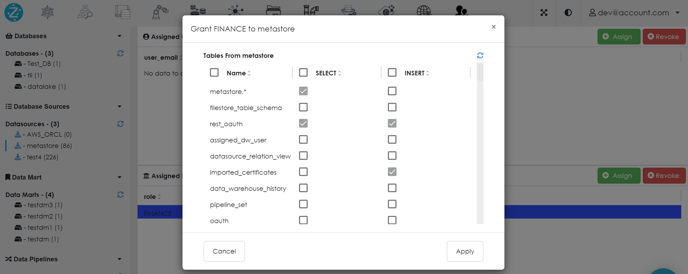
8. Click on the check boxes to select/insert as needed and then click "Apply"
9. Selected permissions will be assigned to that role for that particular data source/file source
10. To revoke the permission, click on the role again.
11. Pop-up will appear. Simply de-select where permission is not needed. This will revoke the permission
12. To completely remove the role from the data source / file source, click on the "Revoke" button.
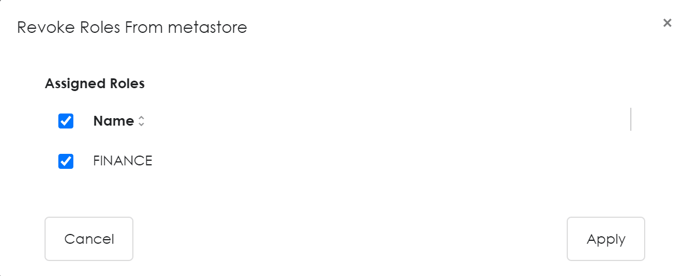
13. Select the role you want revoke and click "Apply."
14. This will completely revoke the role