Row and column level security settings can be established either through the SQL interface, or by using the Advanced Access Control UI. Firstly navigate to the NDP Fabric Builder widget.

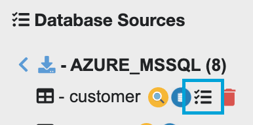
The Advanced Access Control UI can be accessed via the Schema Store View by expanding a data source and clicking on a table name. You will see a button with a tooltip called “Configure Columns” appear. Click on it to launch the Advanced Access Control UI.
UI Overview
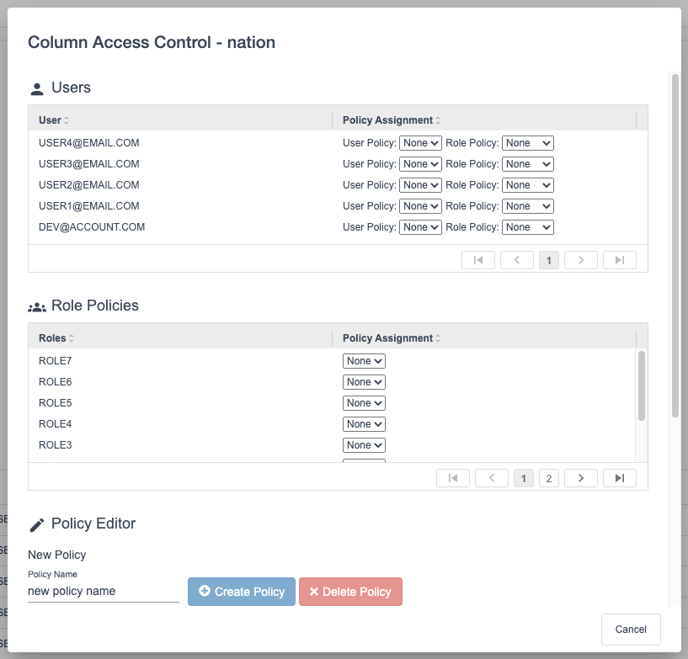
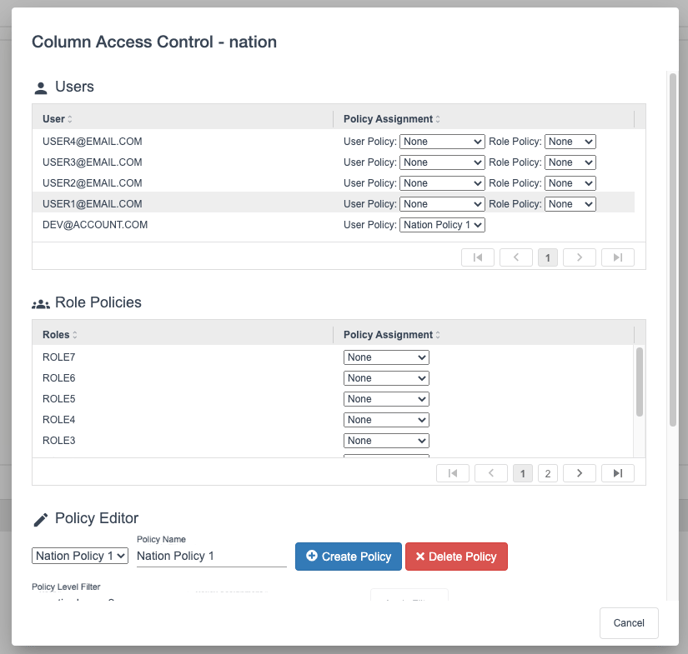
The Advanced Access Control UI comprises of several sections. The “Users” table shows a list of the available users from which we can do either User Policy or Role Policy Assignments. The “Role Policies” table shows the list of available roles and allows you to control the policy assignment for each role. Subsequently, the “Policy Editor” section is for creating, deleting, and setting policy specific information such as the policy name and policy level filter.
General Usage
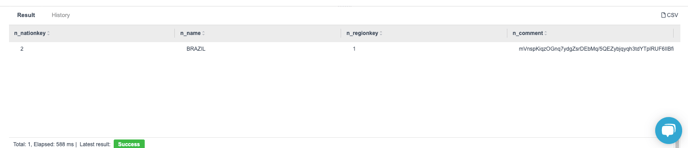
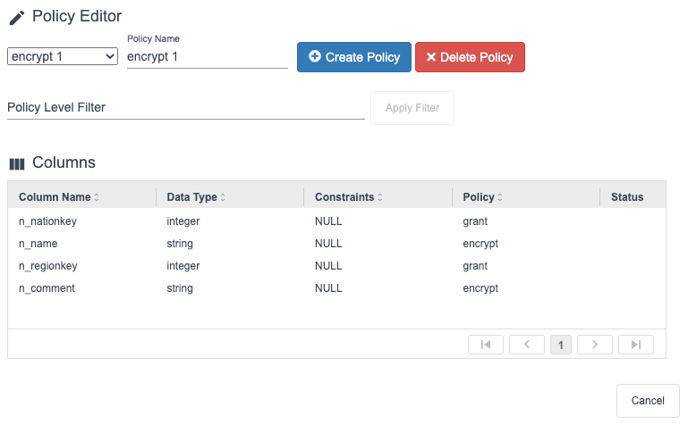
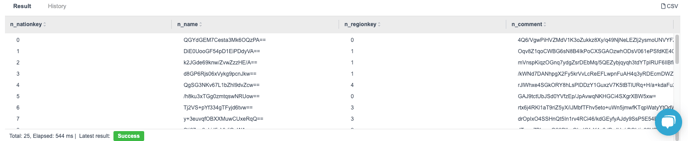
As another example to demonstrate the Advanced Access Control feature, below we have created another policy called “encrypt 1” and encrypted the “n_name” and “n_comment” columns. After assigning the policy to the relevant user in the “Users” table, previewing the table shows that the “encrypt 1” policy is in effect.
Policy (or Row) Level Filter
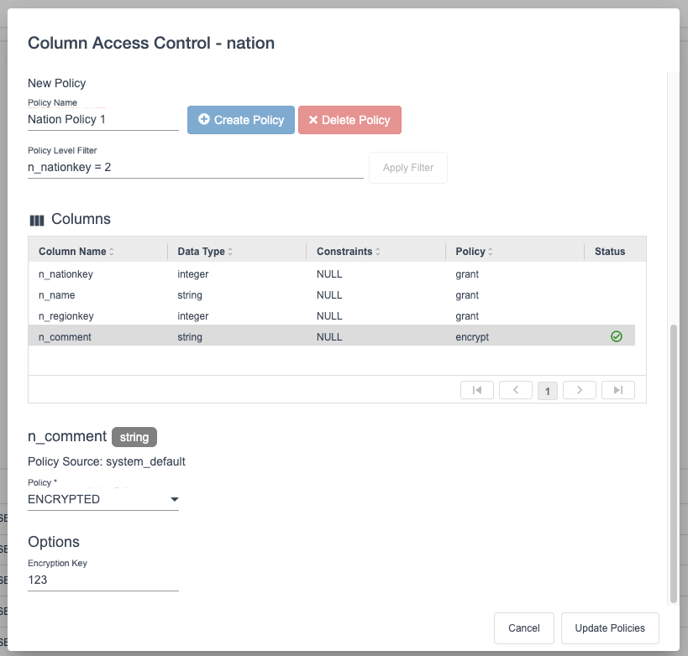
You can optionally provide a policy level filter when creating or editing a policy. Enter a filter expression into the “Policy Level Filter” input field. Click “Apply Filter” when finished. This will validate and check if your filter expression is correct or not. If there are any errors, an error message will appear.
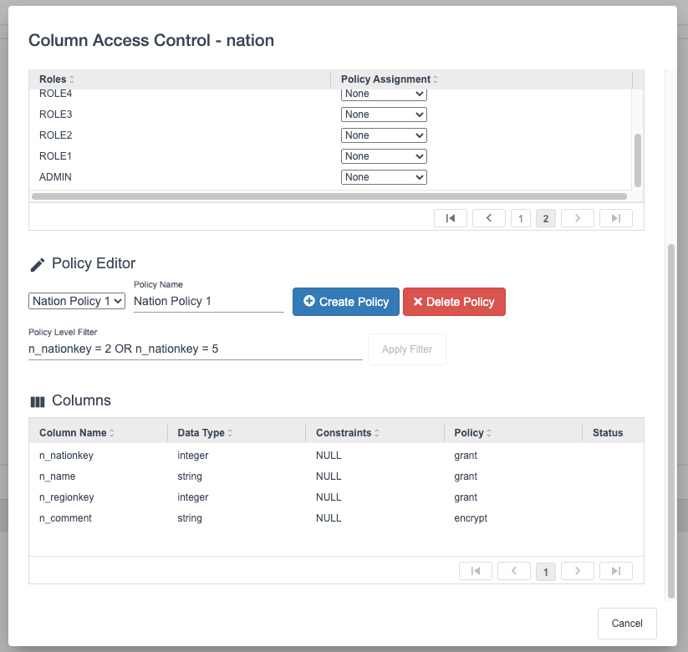
You can also assign policies to each column in the table for a given policy. In the “Columns” table, you will see the column name, column data type, constraints, and the column policy. Select a column to bring up the column’s information.
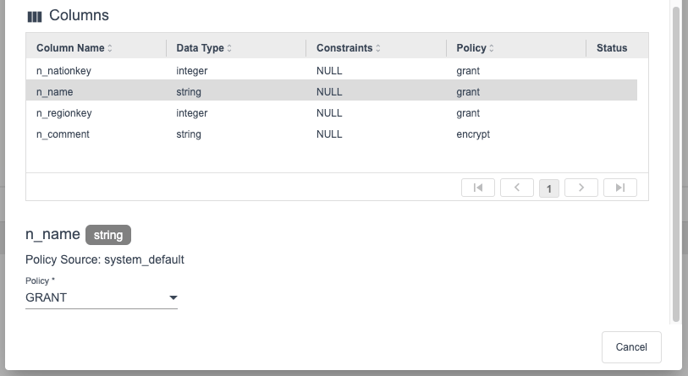 You can see the column name and its associated information. Most notably, you will also see a dropdown to control the policy of the column. The policy types are “Grant”, “Masked”, “Encrypted”, “Deny” and “Hide”.
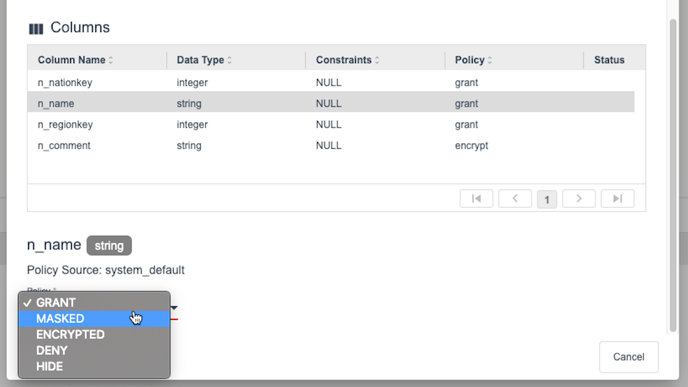 The available policy types.
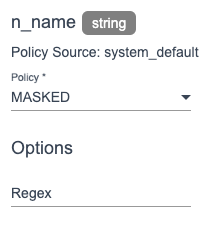
For the “Encrypted” and “Masked” policies, you will see further down below an options section. For the “Encrypted” policy, you supply an encryption key. The “Masked” policy takes a regular expression (e.g. [a-zA-Z0-9]).
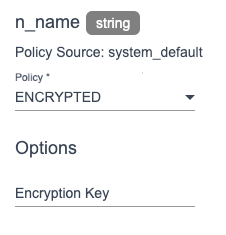
The encrypted policy takes an encryption key
The encrypt and mask policies will only work for columns with a data type of string.
When you are done assigning a policy, hit the “Apply” button at the bottom right of the UI.
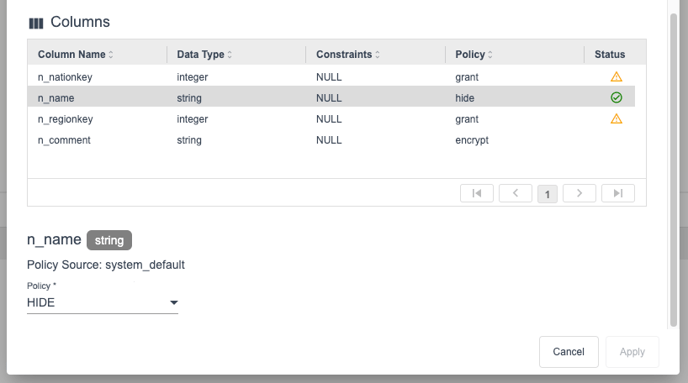
You can also edit a column policy without hitting “Apply” and click on a new column in the Columns table. This will switch to the new columns associated information. The edited policy information of the previous column is temporarily saved for you to get back to when you switch back. However, in order to save the Policy information, you must ensure that all Columns have their details applied. Applied columns have a green tick icon in the status column of the Columns table. Unapplied/modified columns are indicated with an amber warning icon. If there are any unapplied columns remaining, the button to save the policy, “Update Policies”, will not show up.

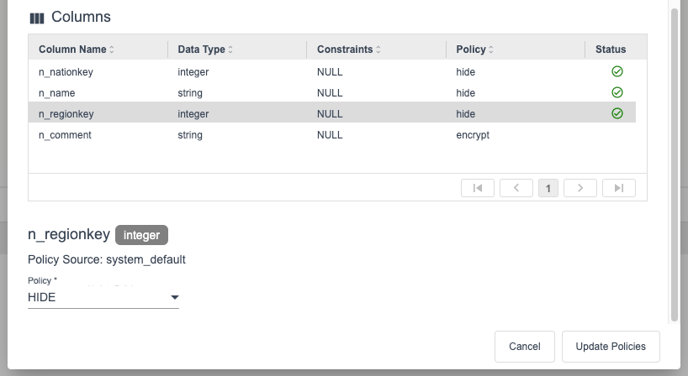
Once you have applied all columns, the “Update Policies” button is enabled.
If the policy level filter is modified, then the “Update Policies” button will be disabled, and you will need to re-validate the policy level filter by clicking “Apply Filter” again before you can proceed with saving the policy.
Policy Management
You can create, delete, or switch between policies to view or edit their details.

Creating a Policy
To create a new policy when a user-created policy is already present, click the “Create Policy” button. This will generate an empty policy template, with text indicating that this is a new policy. Edit the policy to your needs and click “Update Policies” when done.
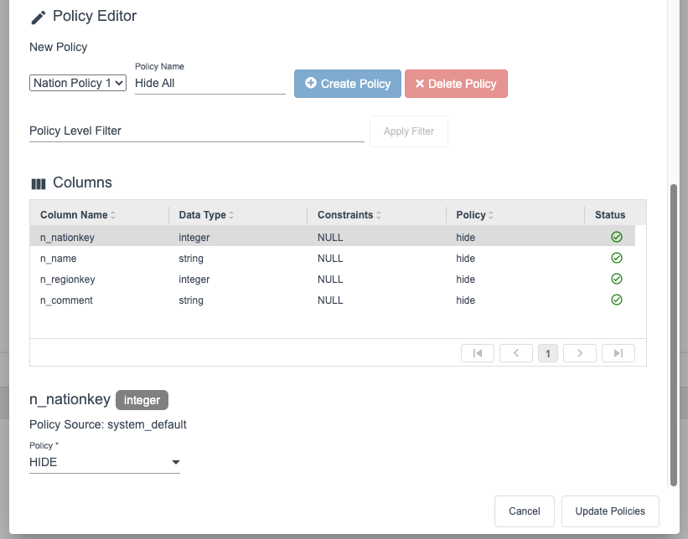 After clicking the “Create Policy” button, you can begin defining the policy.
Switching Between Policies
If you need to switch between policies for viewing or editing a policy, click the policy dropdown and select the policy you would like to switch to.
If you have any modified changes to a policy, they will be discarded when switching over to the new policy.
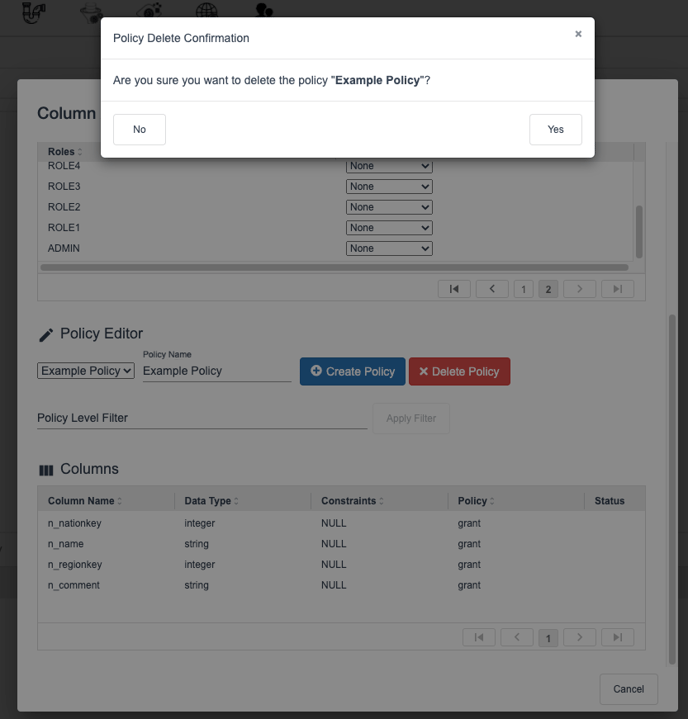
Deleting a Policy
Select the policy you would like to delete via the policy dropdown. Then, click the “Delete Policy” button. A delete confirmation popup will appear asking you to confirm the deletion of the policy. Click “Yes” to delete the policy.
User and Role Policy Assignment
Once you have at least one or more custom policies created, you can begin to assign policies to users and roles. After assigning the policies, ensure you click the “Update Policies” button to save the policy assignments.
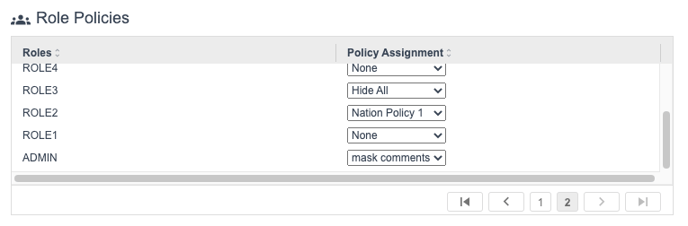
Role Policy Assignment
In the “Role Policies” table, a list of available roles is displayed. Each role has a dropdown associated with it, from which you can assign a policy to it.
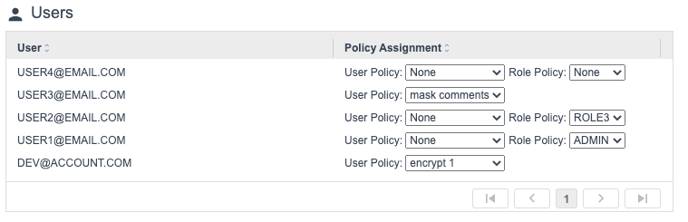
Assigning Policies to Users
The “Users” table displays a list of users and allows you to either assign a user or role policy. If no user policy is supplied for a user (i.e., “None” is selected), the role policy dropdown is shown, allowing you to select a role policy for the user instead. Selecting a user policy that is not “None” will remove the role policy dropdown. This is because user policies have higher precedence than role policies.