Step 1: Setting up Dynamics 365 Account
-
Open Dynamics 365 and log in to your account.
-
In the top right corner, click on "Settings" and select "Advanced Settings" from the dropdown menu.
-
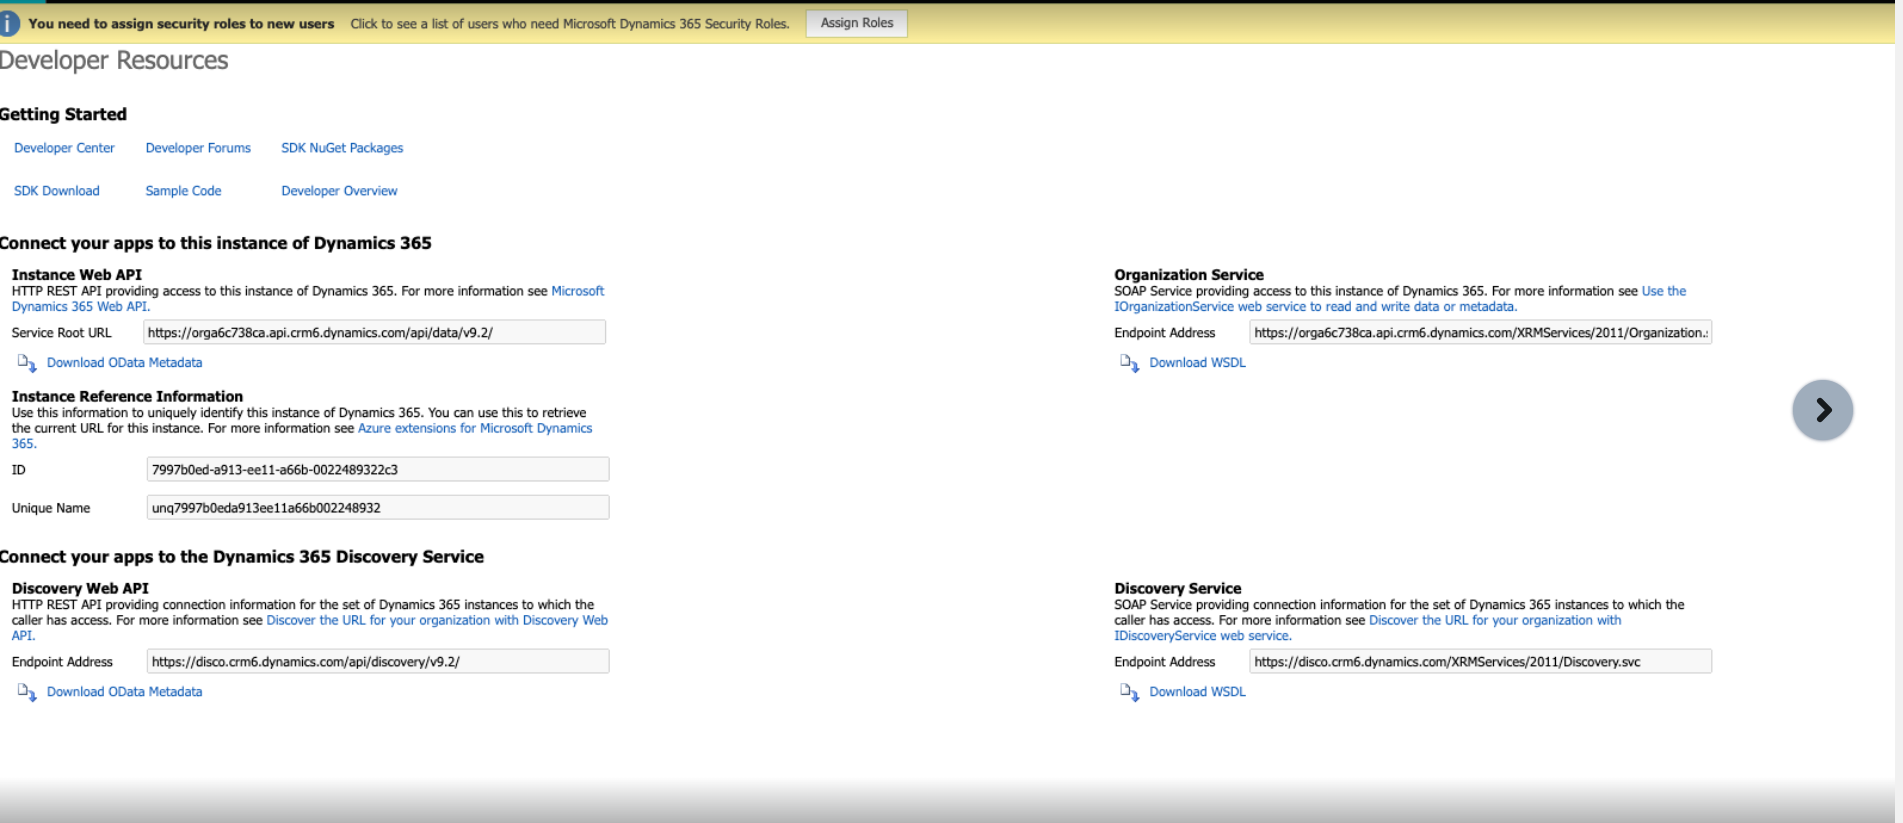
On the top left corner, click on the dropdown menu and select "Customizations" followed by "Developer Resources".
Step 2: Register an Application in Azure AD
-
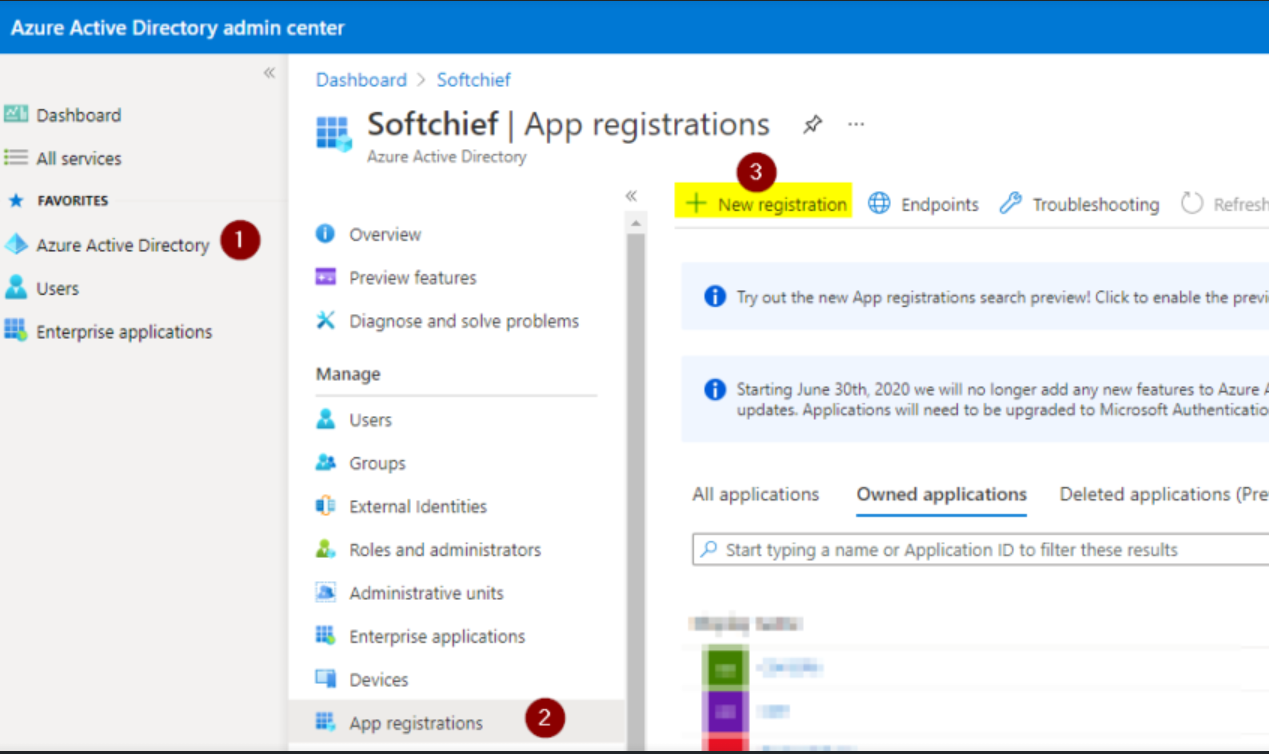
Open Azure Active Directory by clicking on the following link: Azure Active Directory admin center .
-
Click on the "Azure Active Directory" link in the left panel and navigate to the "App Registration" option.
-
Click on the "+ New registration" button to register a new application.
-
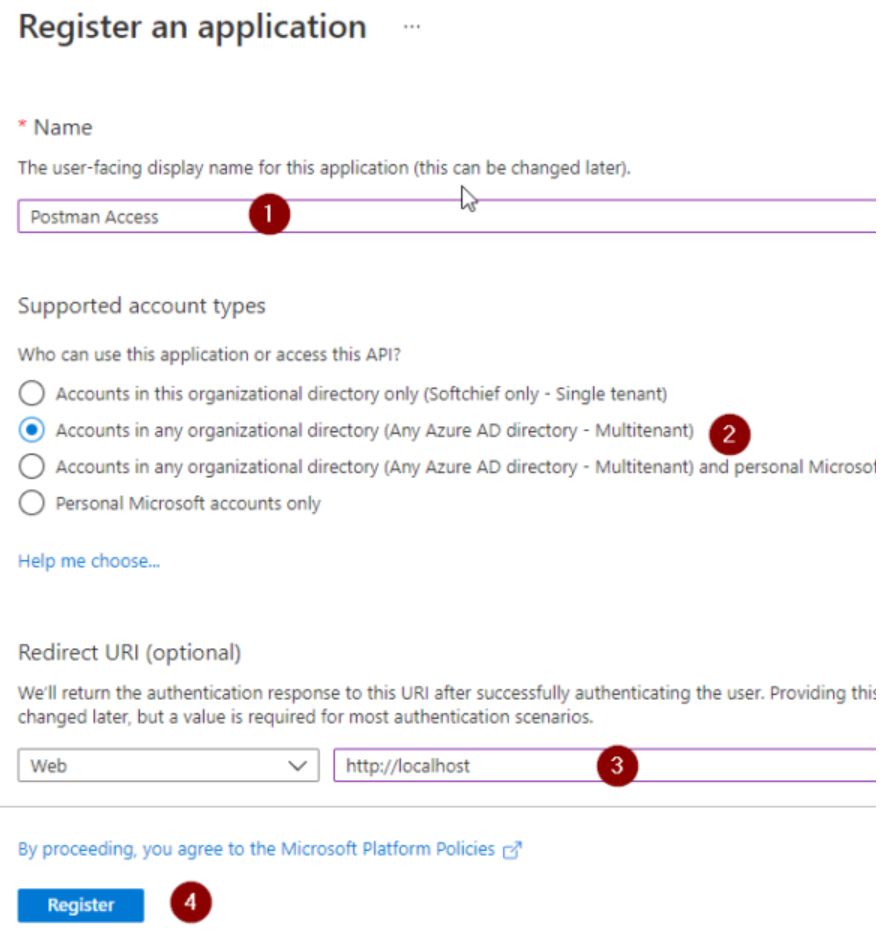
Provide the following details in the "Register an application" screen:
-
Name: Enter a name for your application (e.g., "Postman Access").
-
Supported account types: Choose "Accounts in any organizational directory (Any Azure AD directory – Multitenant)".
-
Redirect URI (optional): Enter a desired redirect URI (e.g., "http://localhost").
-
-
Click on "Register" to save the application.
Step 3: Add API Permissions
-
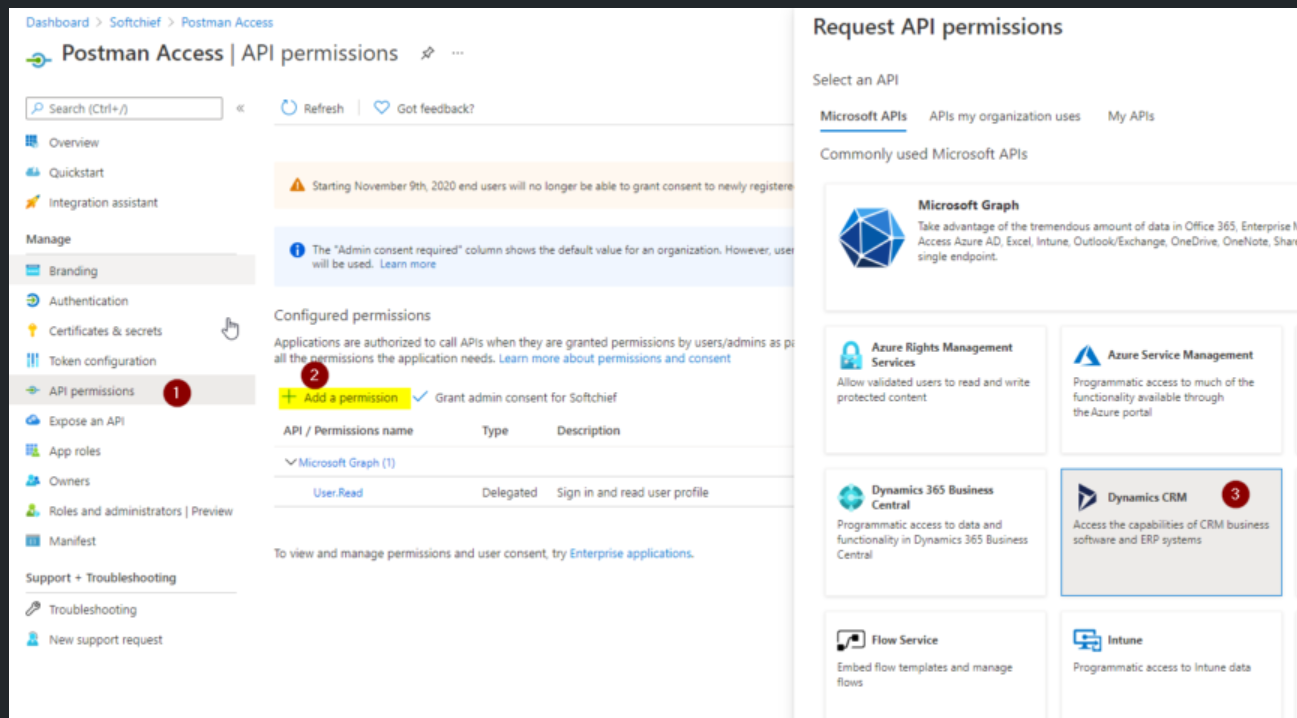
On the application page, click on "API Permissions" and select "+ Add a permission".
-
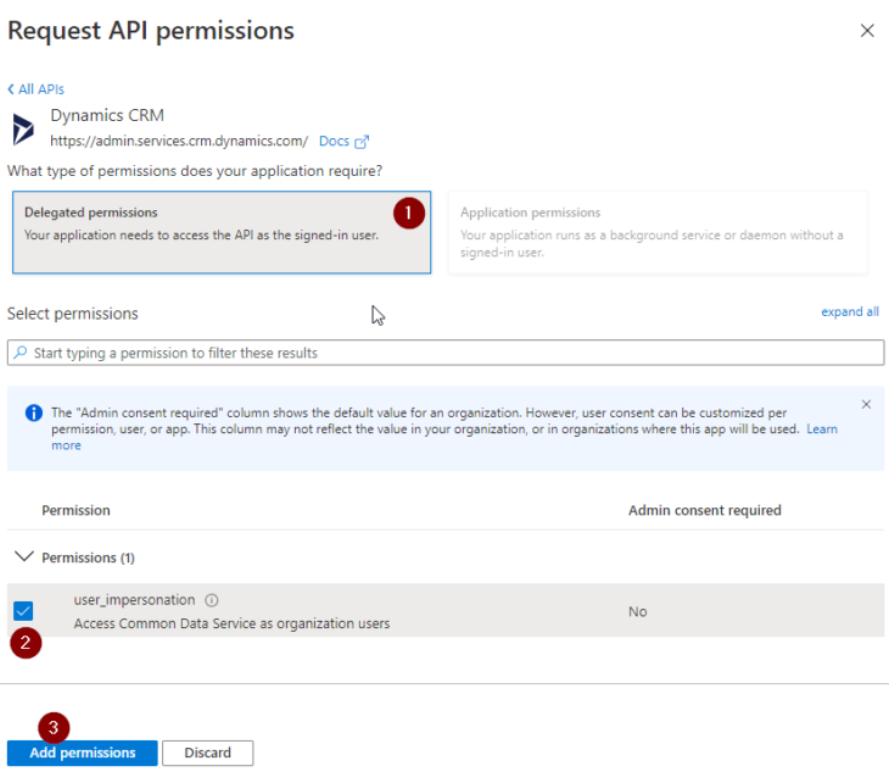
In the "Request API Permission" window, select "Dynamics CRM".
-
In the permission window, select "Delegated permission" and check the "User Impersonation" option, then click "Add Permission".
Step 4: Grant Admin Consent
-
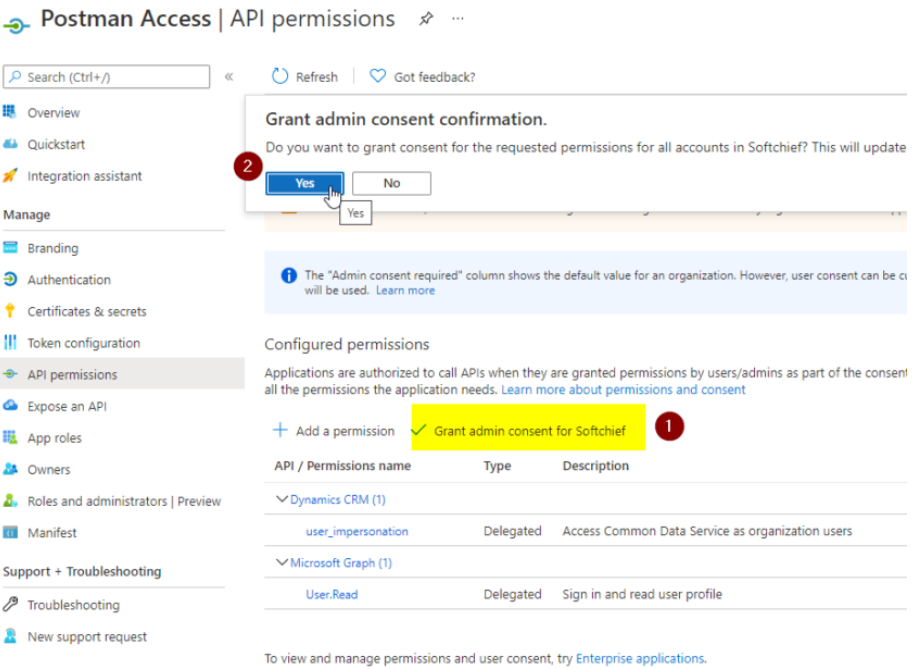
Click on "Grant Admin Consent" and confirm by clicking "Yes" to complete the grant. If the "Grant Admin Consent" option is disabled, please contact your account administrator.
-
Verify that the permissions have been granted admin access.


Step 5: Update Manifest Settings
-
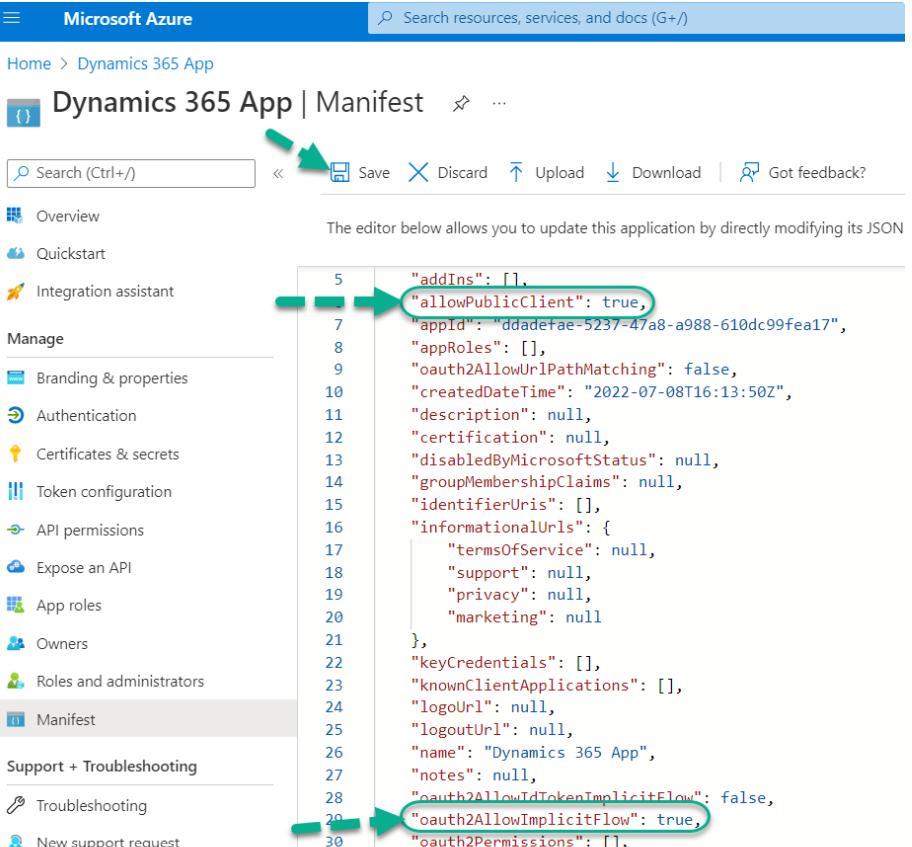
Go to the "Manifest" option.
-
Locate the "allowPublicClient" flag and set it to "true".
-
Similarly, find the "oauth2AllowImplicitFlow" setting and set it to "true".
-
Click on "Save" to apply the changes.
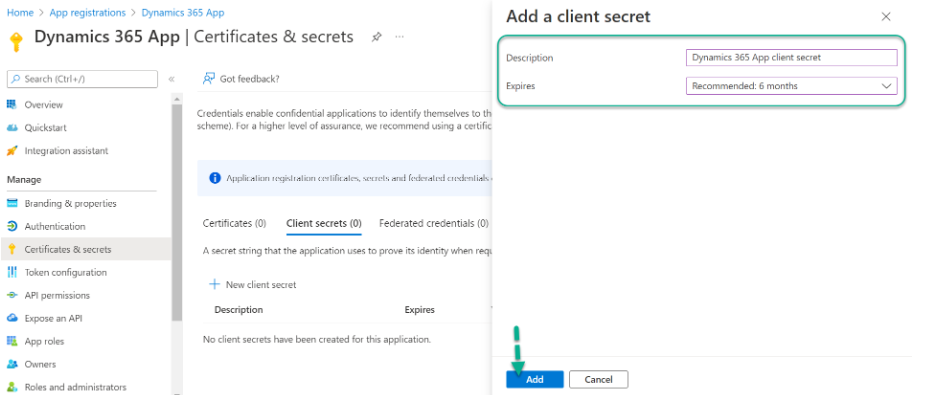
Step 6: Generate Client Secret
-
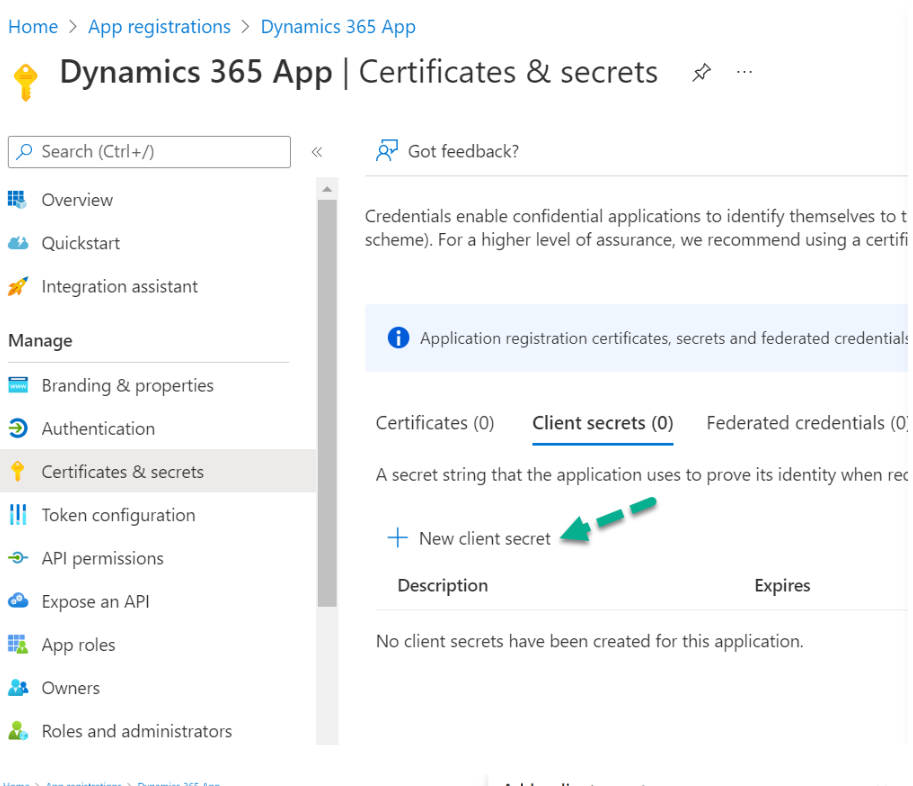
Click on "Certificates & Secrets" on the left panel.
-
Click on "New client secret" to create a new secret.
-
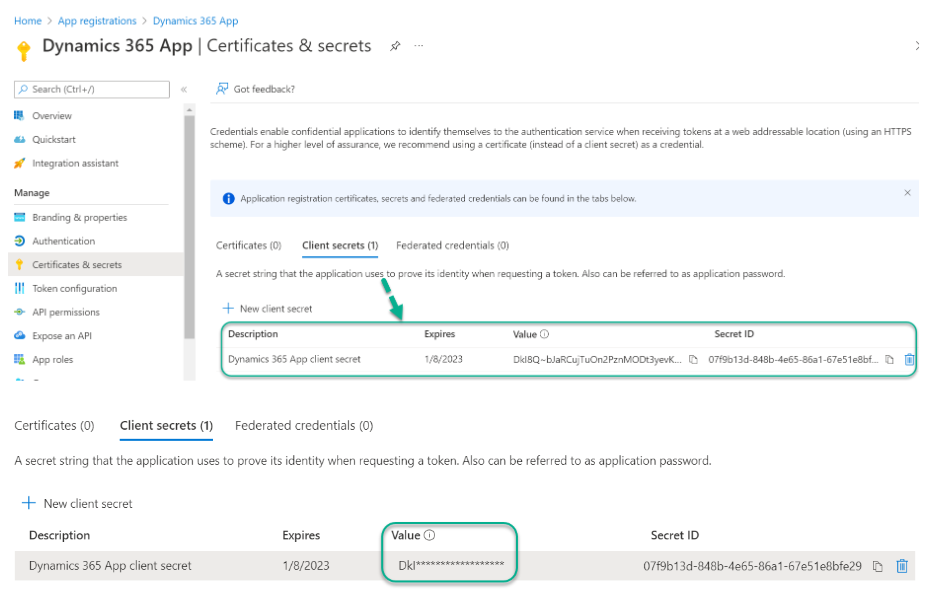
After creating the secret, copy and securely store the "Client Secret Value". Note that this value will be masked after some time.
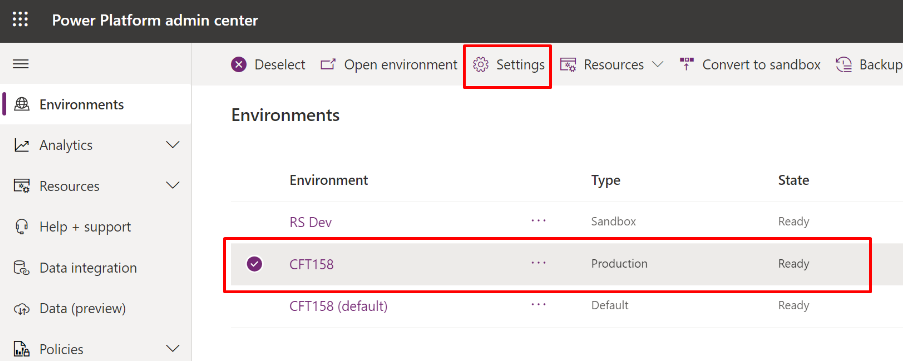
Step 7: Register App in Power Platform Admin Center (PPAC)
-
Access the Power Platform Admin Center (PPAC).
-
In the "Environments" section, locate your Dynamics 365 CRM/Dataverse environment.
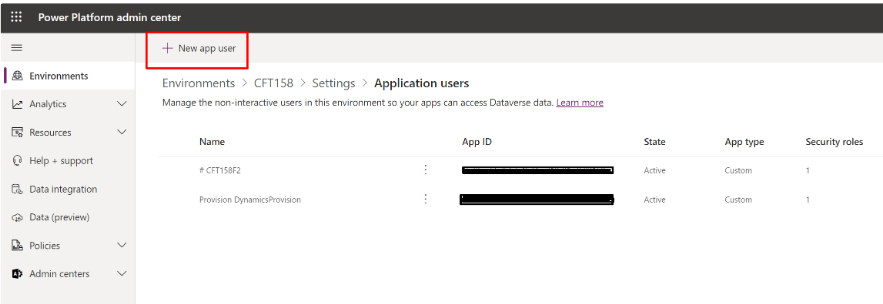
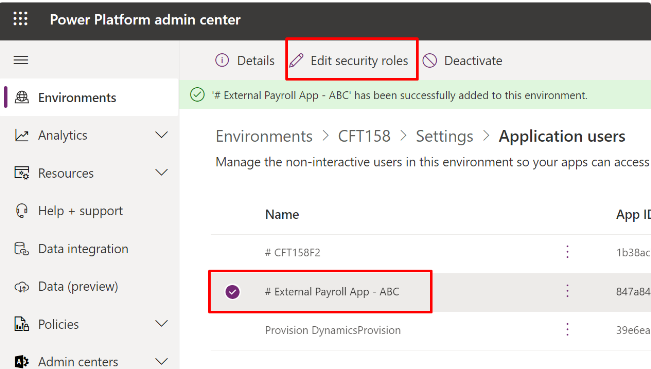
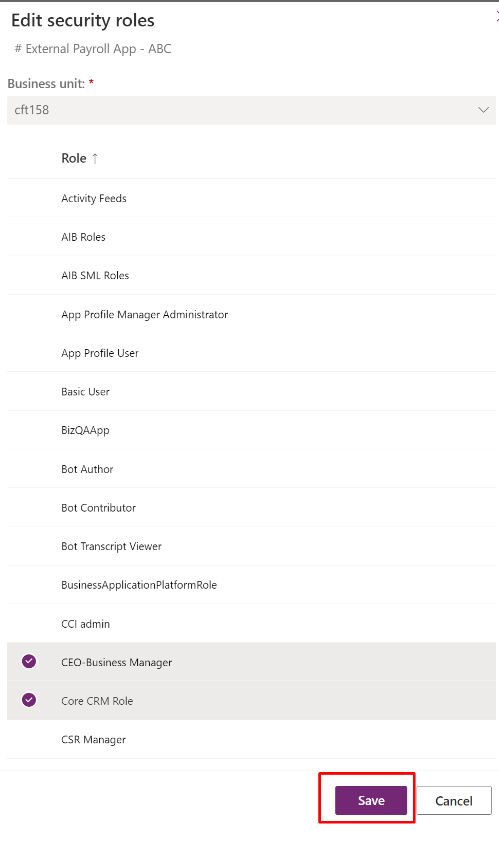
3. Under "Settings," expand the "Users" option, then select "Application Users."
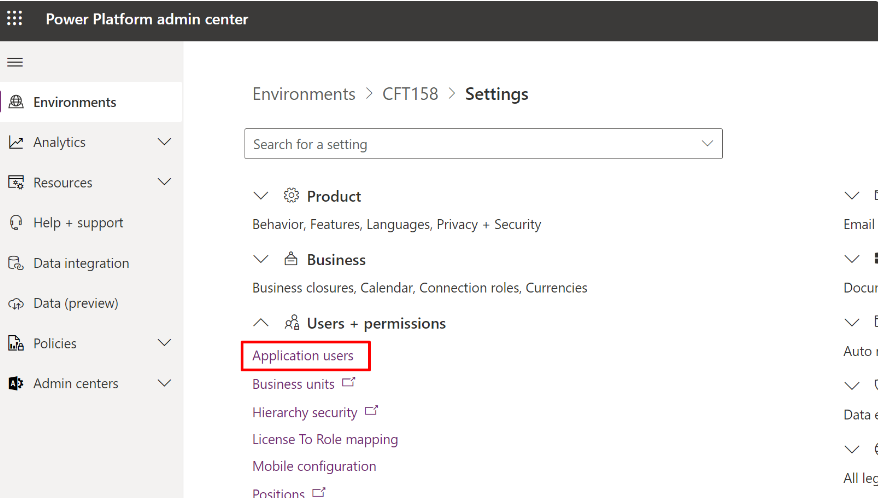
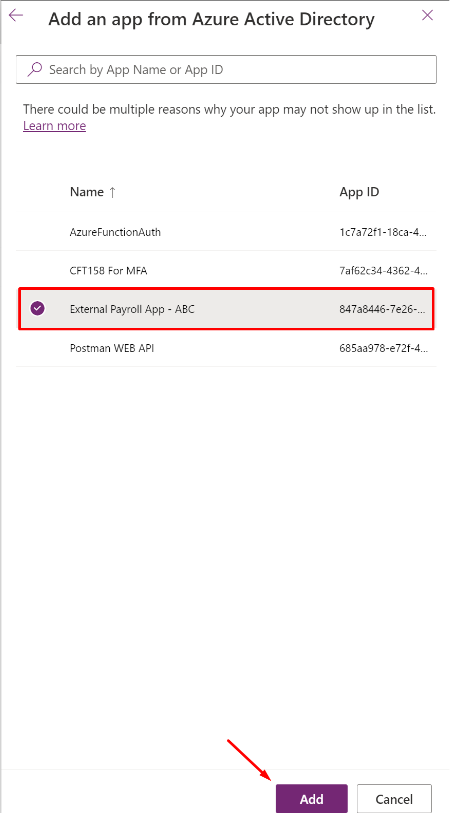
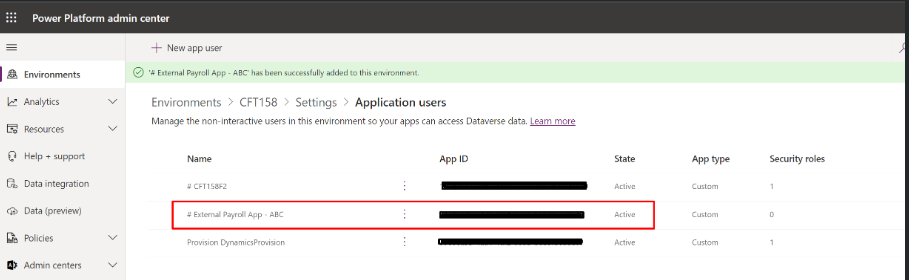
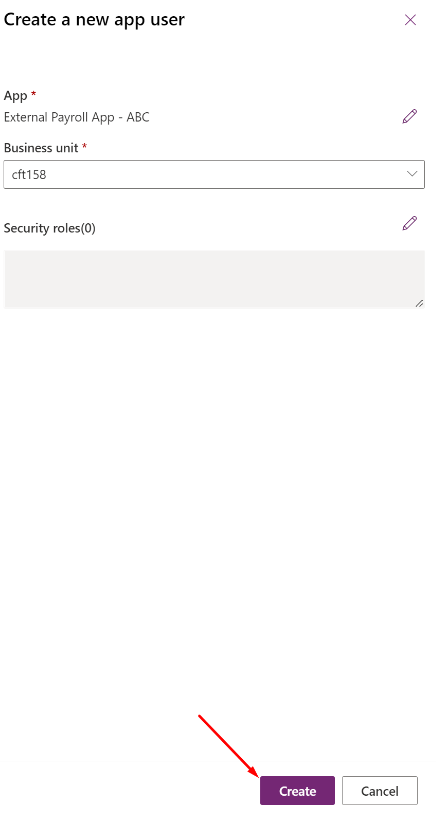
4. Click on the "+ New App User" button.

To connect to Dynamics 365 using Zetaris and the obtained credentials, follow these steps:
Step 1: Save the Required Information
Provide the following information when prompted:
-
Resource: Enter the Service Root URL obtained from Step 1, excluding the "api/data/v9.2/" part of the URL.
-
Directory (Tenant) ID: Enter the Directory (Tenant) ID obtained after Step 5 in the overview section of Azure AD.
-
Client ID: Enter the Client ID obtained after Step 5 in the overview section of Azure AD.
-
Client Secret: Enter the Client Secret obtained from Step 6.
Step 2: Execute the below queries on Zetaris UI in Schema Store View
CREATE LIGHTNING DATABASE D365 DESCRIBE BY "D365 CONNECTION";
------------------------------------------------------------------------------------
UPSERT AUTH d365 REQUEST(
endpoint "https://login.microsoftonline.com/<directory-tenant-id>/oauth2/token",
method "post",
http_encoding "urlencoded"
) HEADER (
) BODY (
grant_type "client_credentials",
resource "<resource>",
client_id "<client-id>",
client_secret "<client-secret>"
);
------------------------------------------------------------------------------------
CREATE LIGHTNING REST TABLE WhoAmI FROM D365 REQUEST(
endpoint "<resource>api/data/v9.2/WhoAmI()",
method "get",
response_type "json",
http_encoding "URLENCODED"
) HEADER (
Authorization "Bearer ${access_token}"
) BODY ()
AUTH BY d365;
------------------------------------------------------------------------------------
Example Queries:
CREATE LIGHTNING DATABASE D365 DESCRIBE BY "D365 CONNECTION";
------------------------------------------------------------------------------------
UPSERT AUTH d365 REQUEST(
endpoint "https://login.microsoftonline.com/0d945ac4-faea-4f93-81fd-6a0bb13d764d/oauth2/token",
method "post",
http_encoding "urlencoded"
) HEADER (
) BODY (
grant_type "client_credentials",
resource "https://orga6c738ca.api.crm6.dynamics.com/",
client_id "02e3dc0d-8bca-xxxxxxxxxxxxxxxxxxx",
client_secret "HTT8Q~dtiLqxxxxxxxxxxxxxxxxxxxxxxxx"
);
------------------------------------------------------------------------------------
CREATE LIGHTNING REST TABLE WhoAmI FROM D365 REQUEST(
endpoint "https://orga6c738ca.api.crm6.dynamics.com/api/data/v9.2/WhoAmI()",
method "get",
response_type "json",
http_encoding "URLENCODED"
) HEADER (
Authorization "Bearer ${access_token}"
) BODY ()
AUTH BY d365;
------------------------------------------------------------------------------------