Prerequisite:
Please note that requested access to
GITHUB links will be required in order access files.
JDBC Server Configuration
The JDBC Connector is installed with the JAR files required to Databricks via JDBC, DatabricksJDBC<version>.jar, and automatically registers these JARs.
When a JDBC server is configured for Databricks access, the JDBC driver class name must be specified, database URL, and client credentials just like configuring a client connection to an SQL database.
To access Databricks via JDBC, the following properties must be specified and values in the jdbc-site.xml server configuration file must be entered:
|
Property |
Value |
|---|---|
|
jdbc.driver |
com.databricks.client.jdbc.Driver |
|
jdbc.url |
jdbc:databricks://<databricks_host>:<databricks_port> |
The latest Databricks JDBC connector can be downloaded from
- Start the container/service.
- Download the driver.
- Place it in /home/zetaris/server/latest/jdbc-lib.
- Stop container /service.
Databricks Configuration
- Setup cluster in Databricks. Configured “Standard_DS3_v2“ cluster for trial purposes.

-
Setup Notebook for Delta Tables.
-
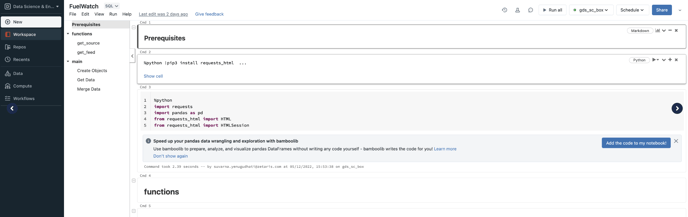
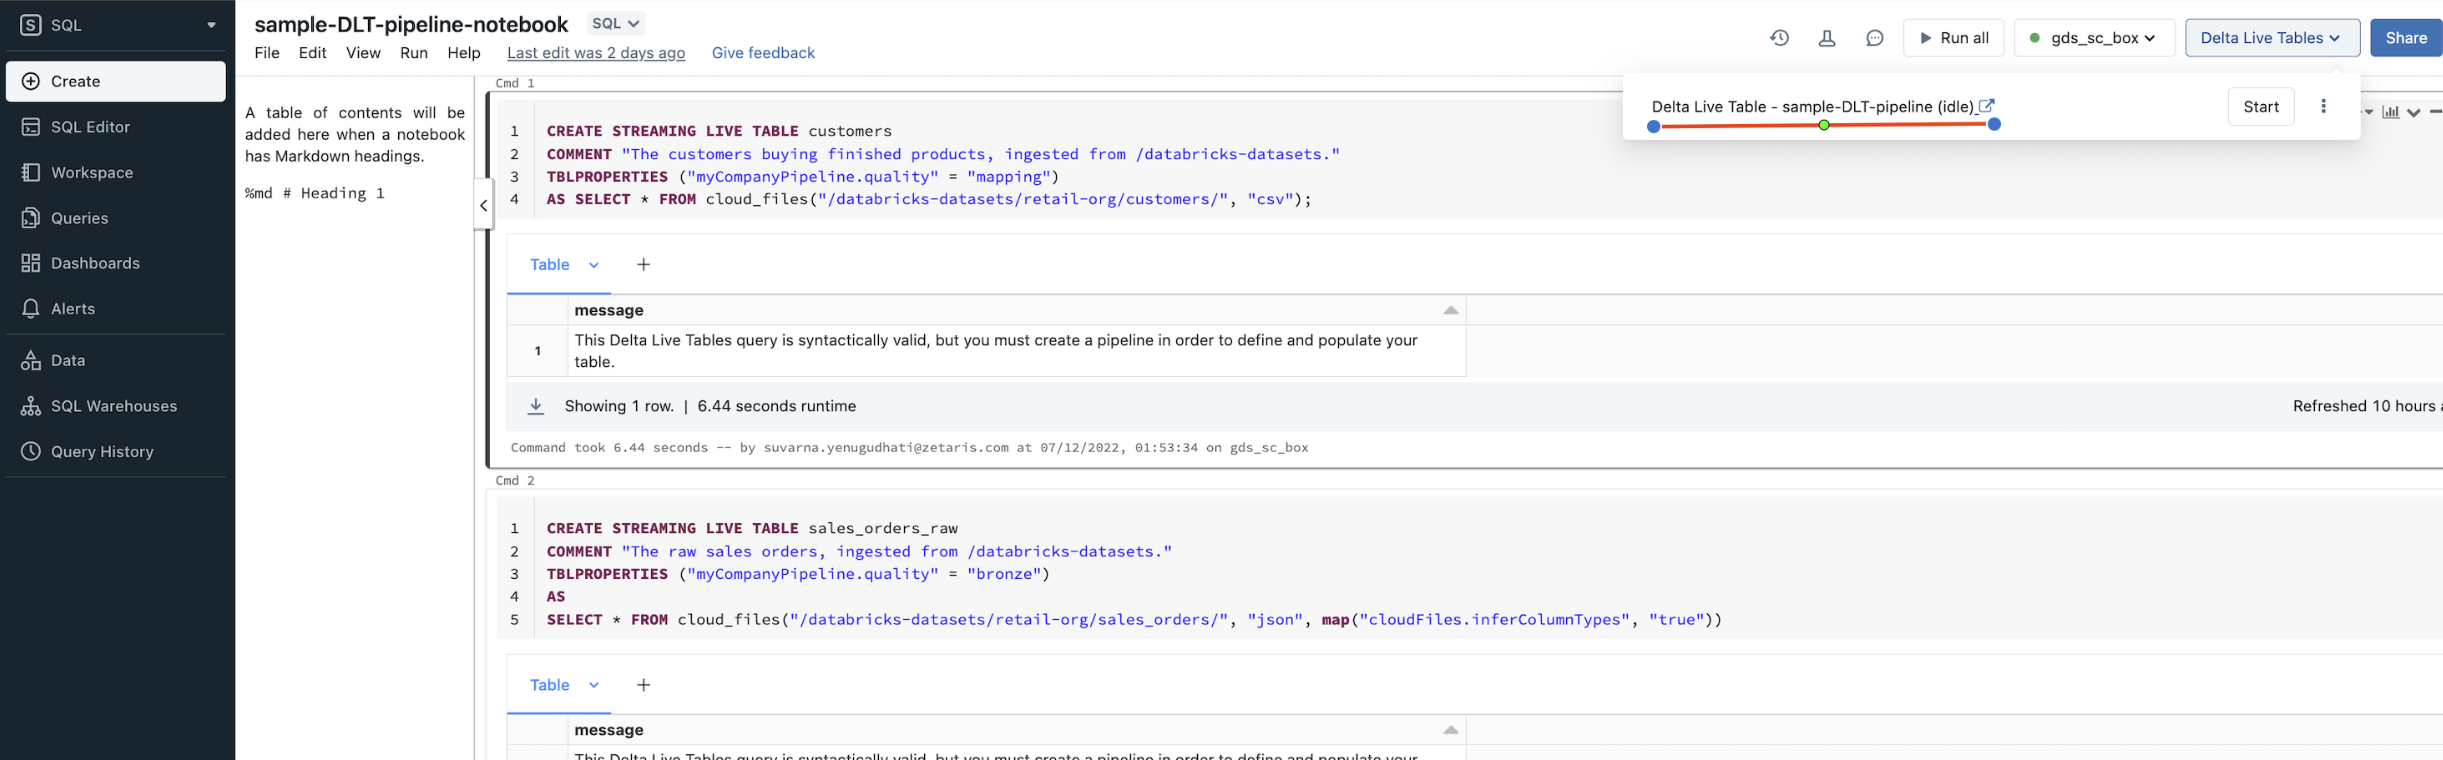
The following is a sample notebook created to load data to Delta Tables - Import this sample notebook into workspace: FuelWatch.dbc
-
-
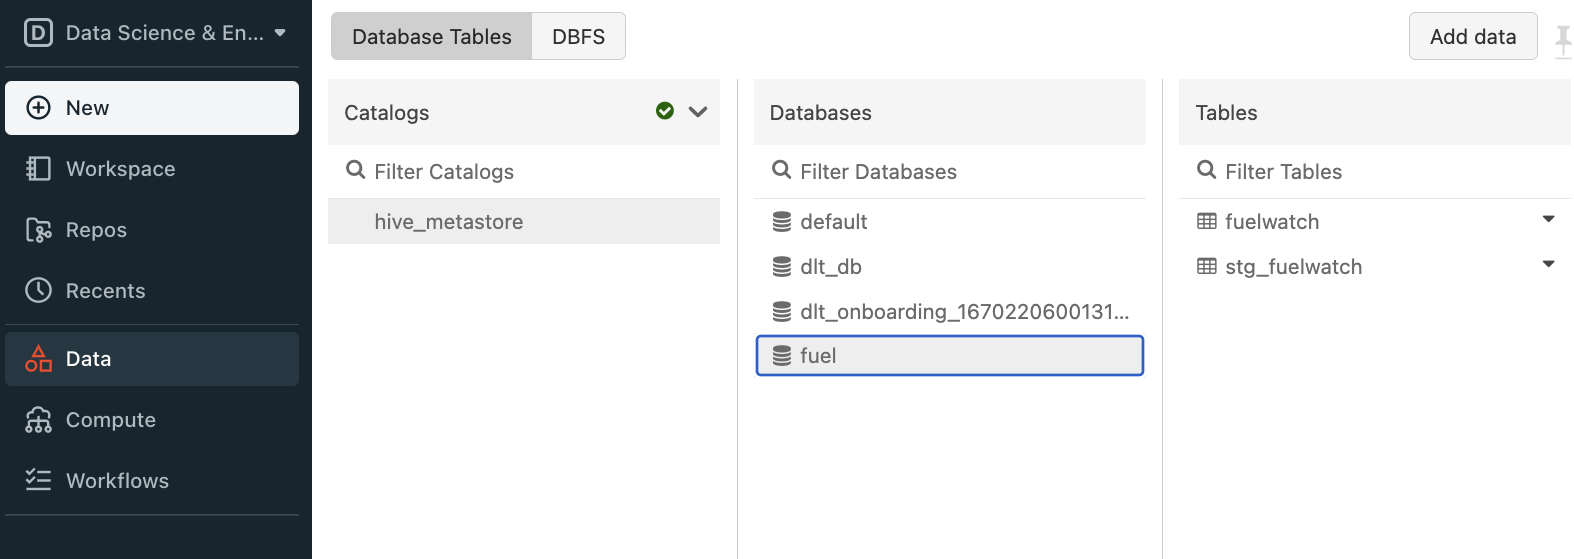
Attach & run notebook with the cluster created in Step 1. This step created “fuel“ database with delta tables in hive_metastore.
-
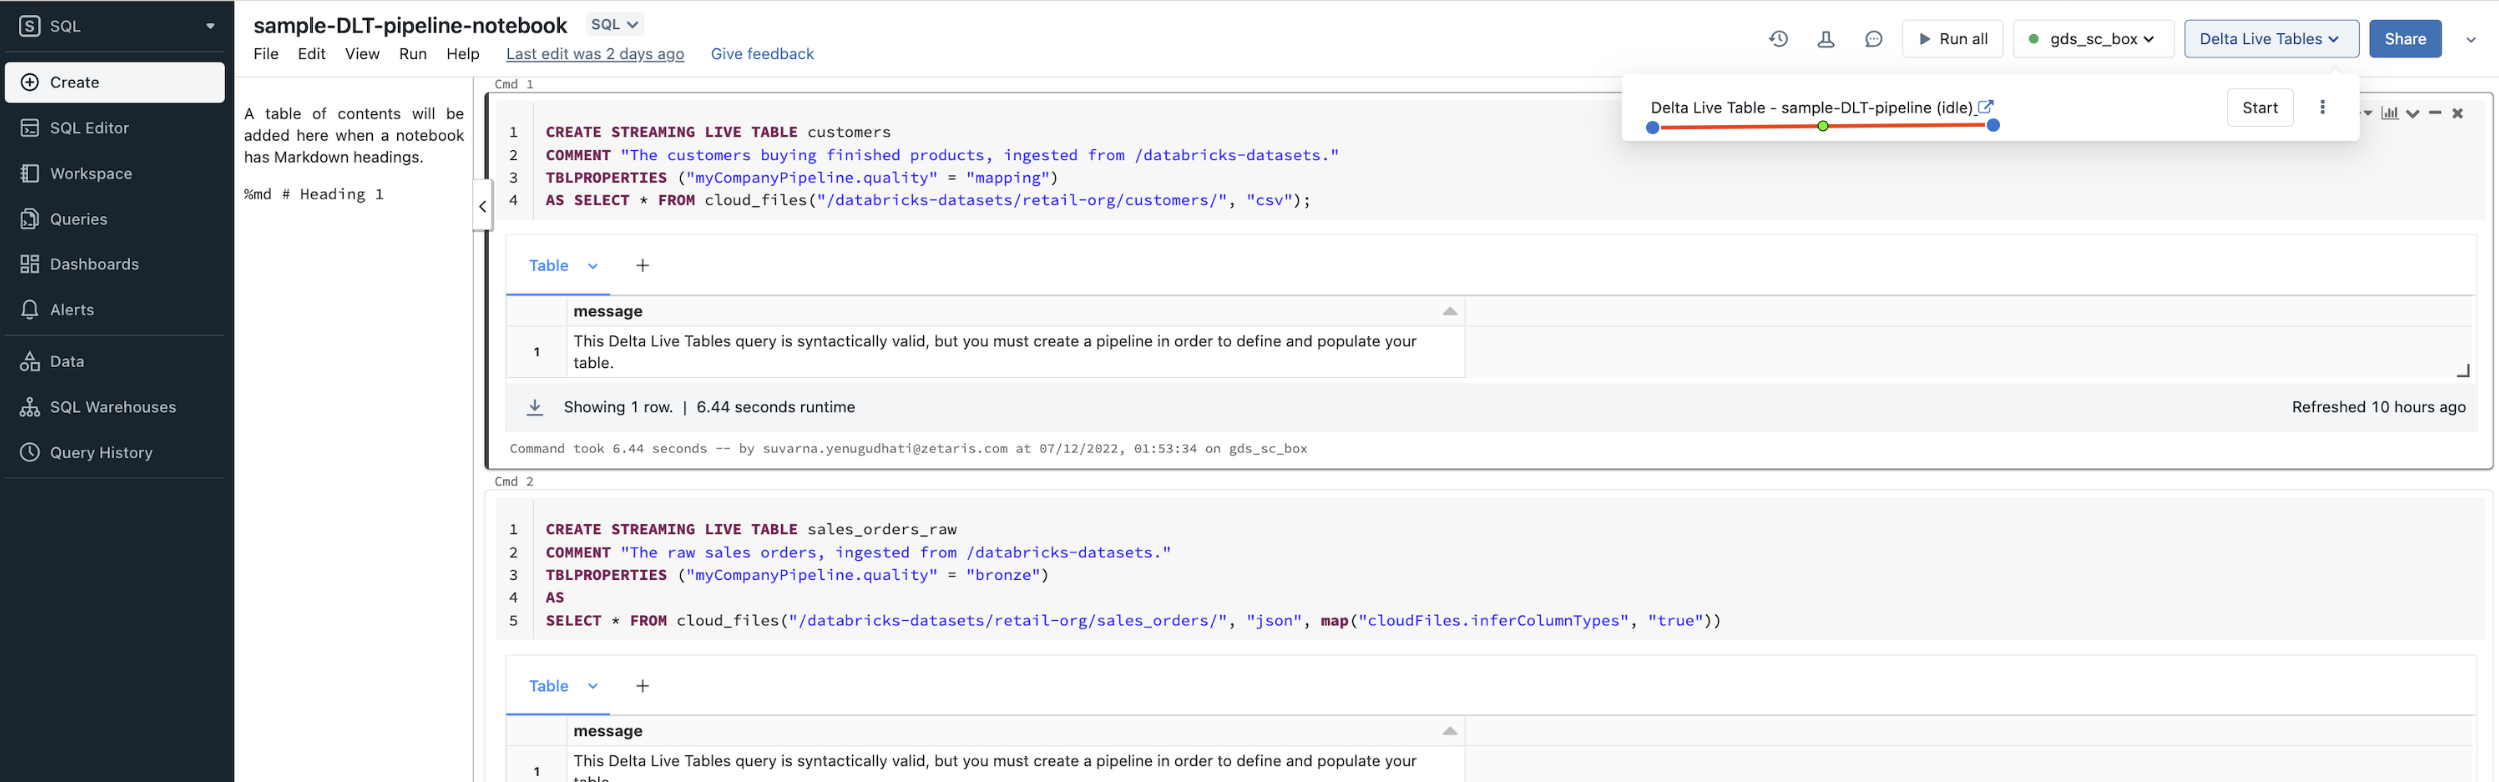
Import the following example notebook into workspace and start “Delta Live Table - sample-DLT-pipeline“ pipeline: sample-DLT-pipeline-notebook.dbc
-
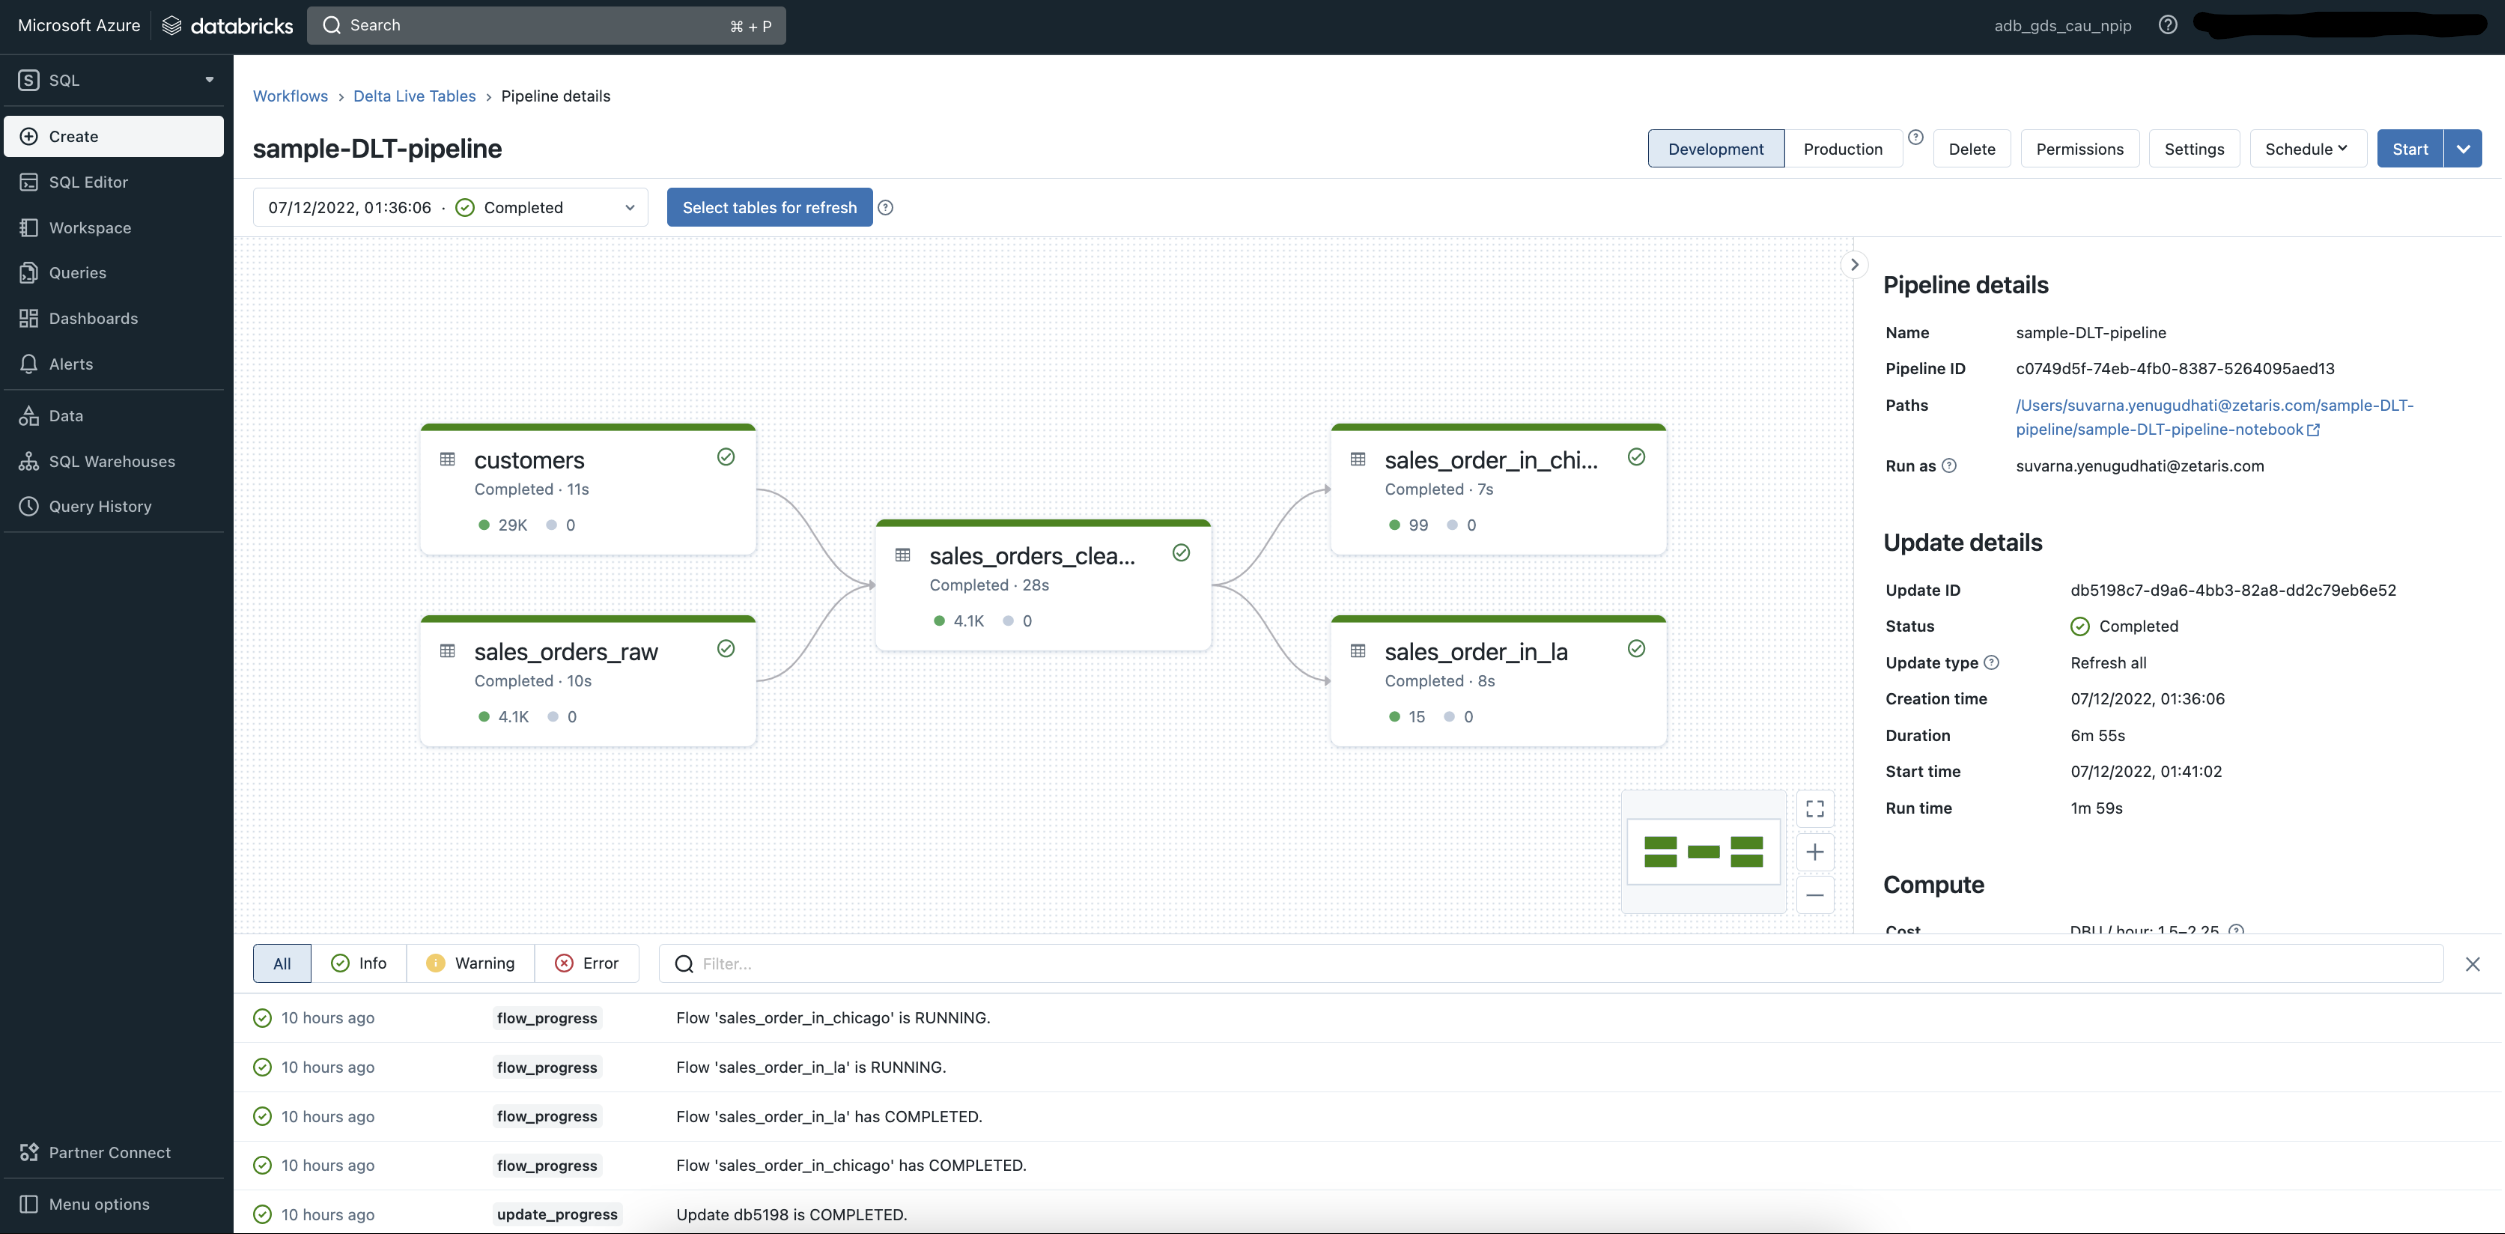
Once pipeline execution completed successfully “dbt_db“ database with delta live tables will be created in hive_metastore.
Get connection details for a cluster:
Log in to your Databricks workspace and go to the Data Science & Engineering or Databricks Machine Learning persona-based environment.
Click Compute in the sidebar.
Choose a cluster to connect to.
Navigate to Advanced Options.
Click on the JDBC/ODBC tab.
Copy the connection details.
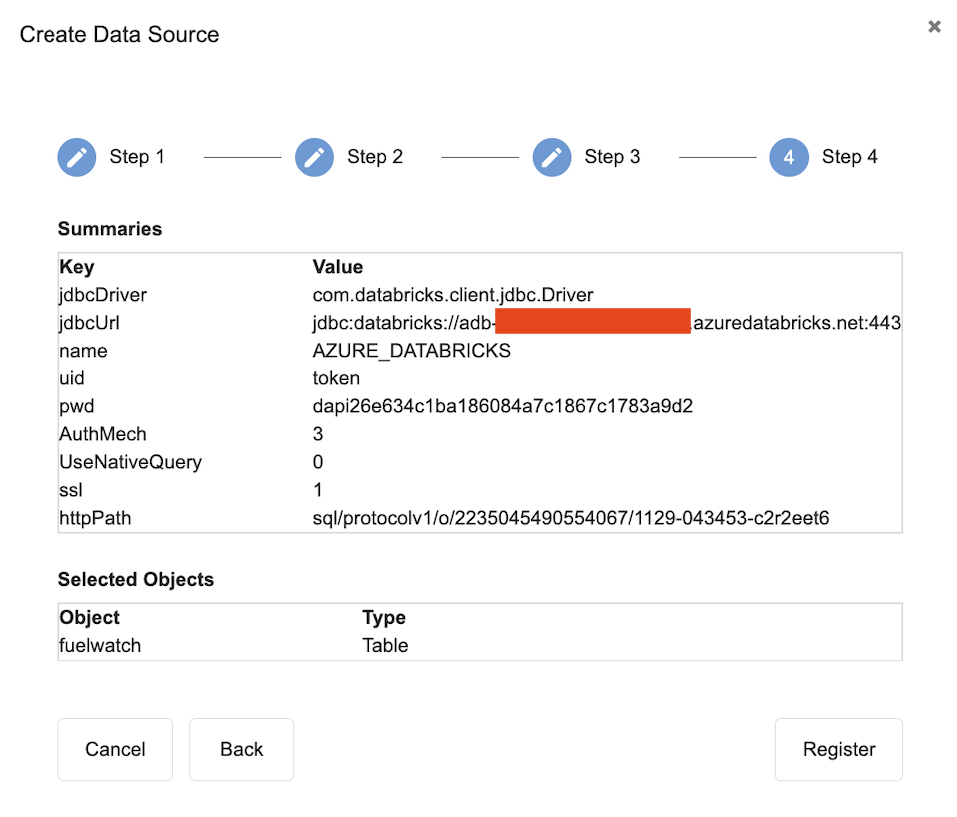
Establishing connection to Databricks
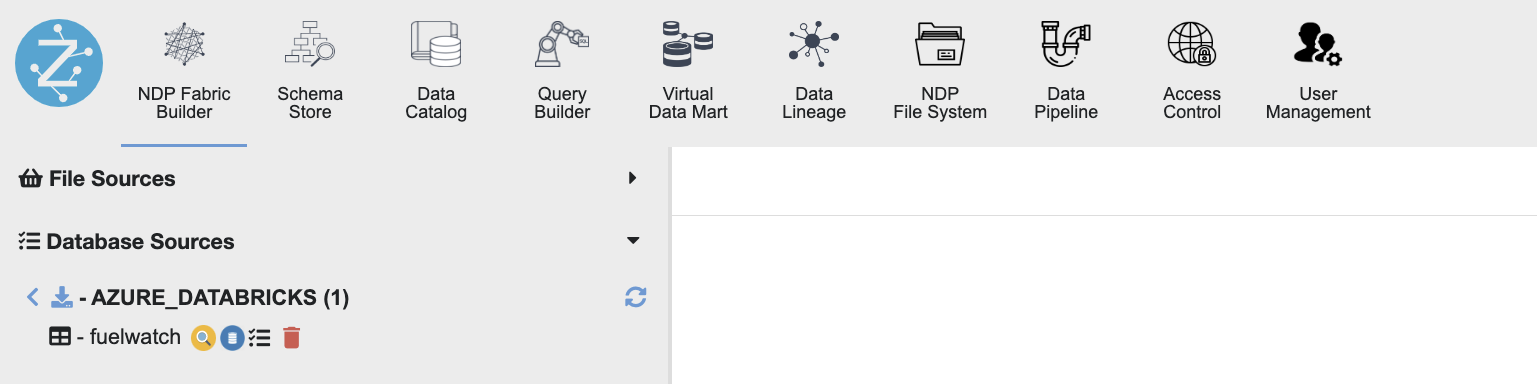
Connect via NDP Fabric Builder:
- Select the NDP Fabric Builder
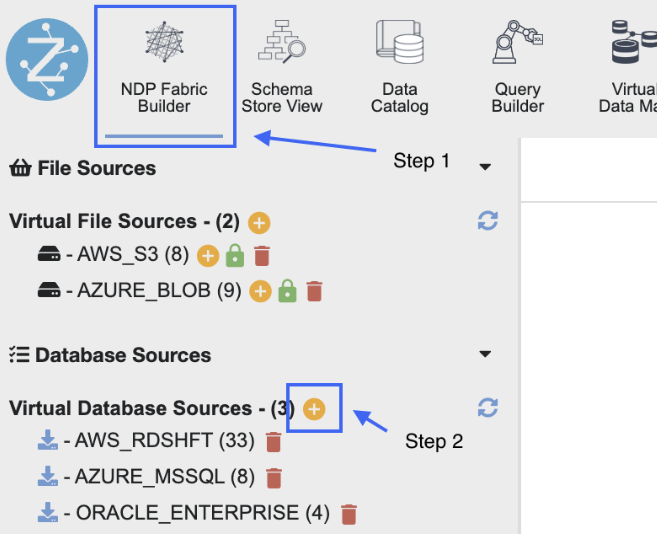
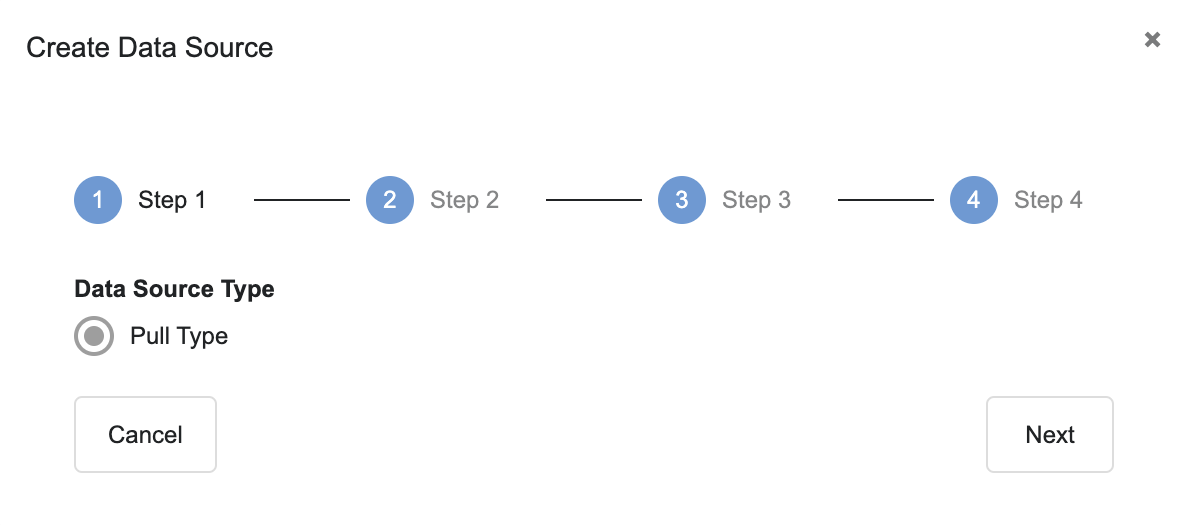
- Select the + icon to create a new datasource, then select 'Pull type'.
-
Enter the necessary fields as outlined in the screenshot below:

-
Required Fields:
Name
Description
Data Source Name
Any name JDBC Driver Class
com.databricks.client.jdbc.Driver
JDBC URL
Use the connection URL to supply connection information to the data store that you are accessing
Format - jdbc:databricks://[Host]:[Port]
Note - By default, Databricks uses port 443.
Required Properties/Parameters:
Name
Description
AuthMech
The Databricks JDBC Driver supports the following authentication mechanisms:
- User Name And Password
- OAuth 2.0
Sample connection uses User Name & Password mechanism and set the AuthMech property to 3UID
Appropriate username for accessing the Databricks server.
By default, the connector authenticates the connection using the user name token.
PWD
Password corresponding to the username provided.
If UID is either set to token or left at the default value (which is also token), then set the PWD property to the Databricks token value that you want to use for authentication
ssl
This property specifies whether the connector requires the name of the CA-issued SSL certificate to match the host name of the Databricks server.
-
0: The connector requires the names to match.
-
1: The connector allows the names to mismatch.
Default value: 0
httpPath
Azure Databricks compute resources URL
Optional Properties/Parameters:
Name
Description
Schema
By default, the connector uses the schema named default
UseNativeQuery
This property specifies whether the connector transforms the queries emitted by applications.
-
0: The connector transforms the queries emitted by applications and converts them into an equivalent form in HiveQL.
-
1: The connector does not transform the queries emitted by applications, so the native query is used.
-
2: The connector automatically sets this property to either 0 or 1, depending on the server capabilities.
Default value: 2
transportMode
The transport protocol to use in the Thrift layer
Default value: http
-
Properties are case-sensitive.
- Do not duplicate properties in the connection.
Refer to the Databricks JDBC Driver Install and Configuration Guide for more properties & respective values.
-
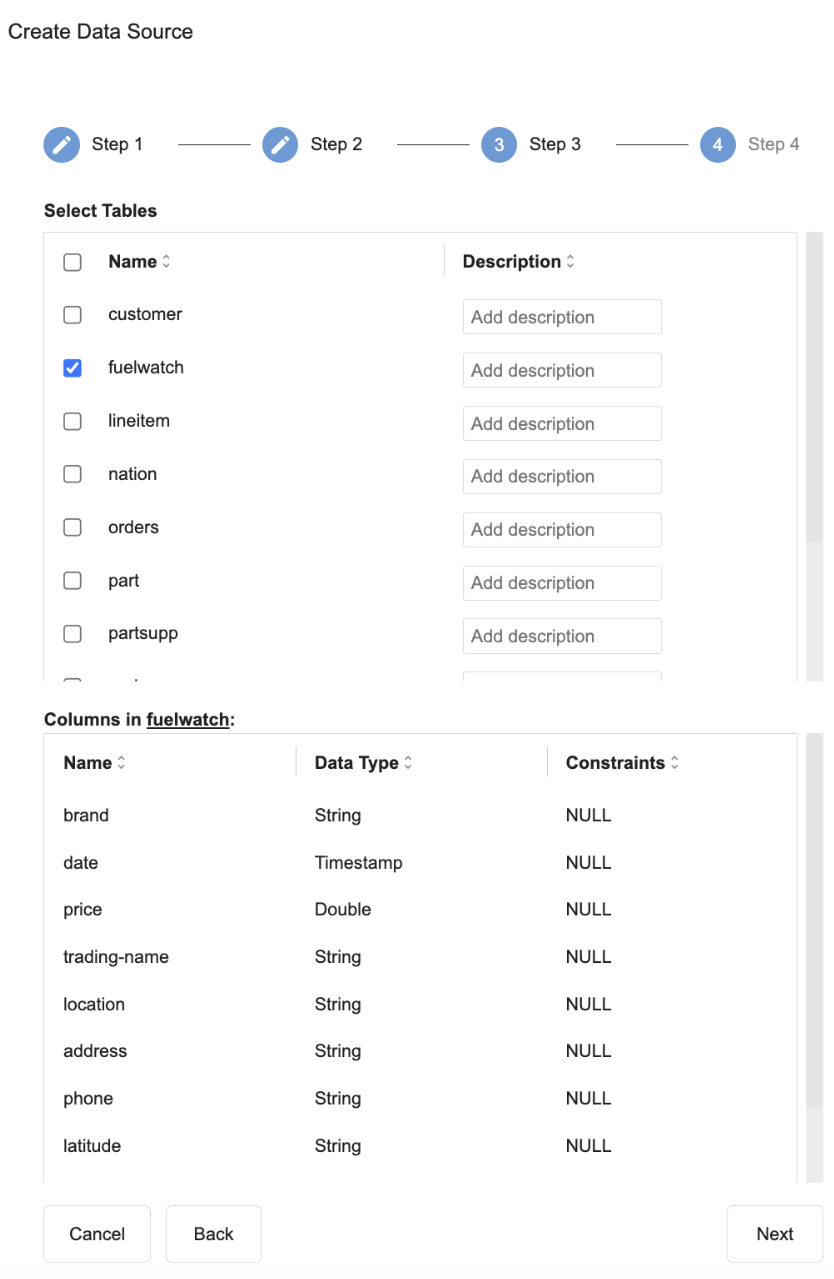
- Select the tables you want or select all
- Finalise connection.
Connect via SQL Editor:
Example connection string below with Access token authentication:
CREATE DATASOURCE AZURE_DATABRICKS_FW DESCRIBE BY "db" OPTIONS (

    jdbcdriver "com.databricks.client.jdbc.Driver",

    jdbcurl "jdbc:databricks://host:port",

    username "token" ,

    password "dapi26e634c1ba186084a7c1867c1783a9d2",

    transportMode "http",

    ssl "1",

    httpPath "sql/protocolv1/o/2235045490554067/1129-043453-c2r2eet6",

    AuthMech "3",

    UseNativeQuery "0",

    Schema "fuel"

);

REGISTER DATASOURCE TABLES FROM AZURE_DATABRICKS_FW;
References
Configure the Databricks ODBC and JDBC drivers - Azure Databricks
Latest configuration Guide available with Databricks JDBC Connector Download